> ## Documentation Index
> Fetch the complete documentation index at: https://docs.ownid.com/llms.txt
> Use this file to discover all available pages before exploring further.
# Quickstart
> Implement a consistent and intuitive experience across both desktop and mobile platforms, fully orchestrated by OwnID
## Introduction
This guide will walk you through the process of integrating OwnID's Elite solution into your frontend application.
When using the OwnID Elite, users are presented with a consistent and intuitive experience across both desktop and mobile platforms, fully orchestrated by OwnID.
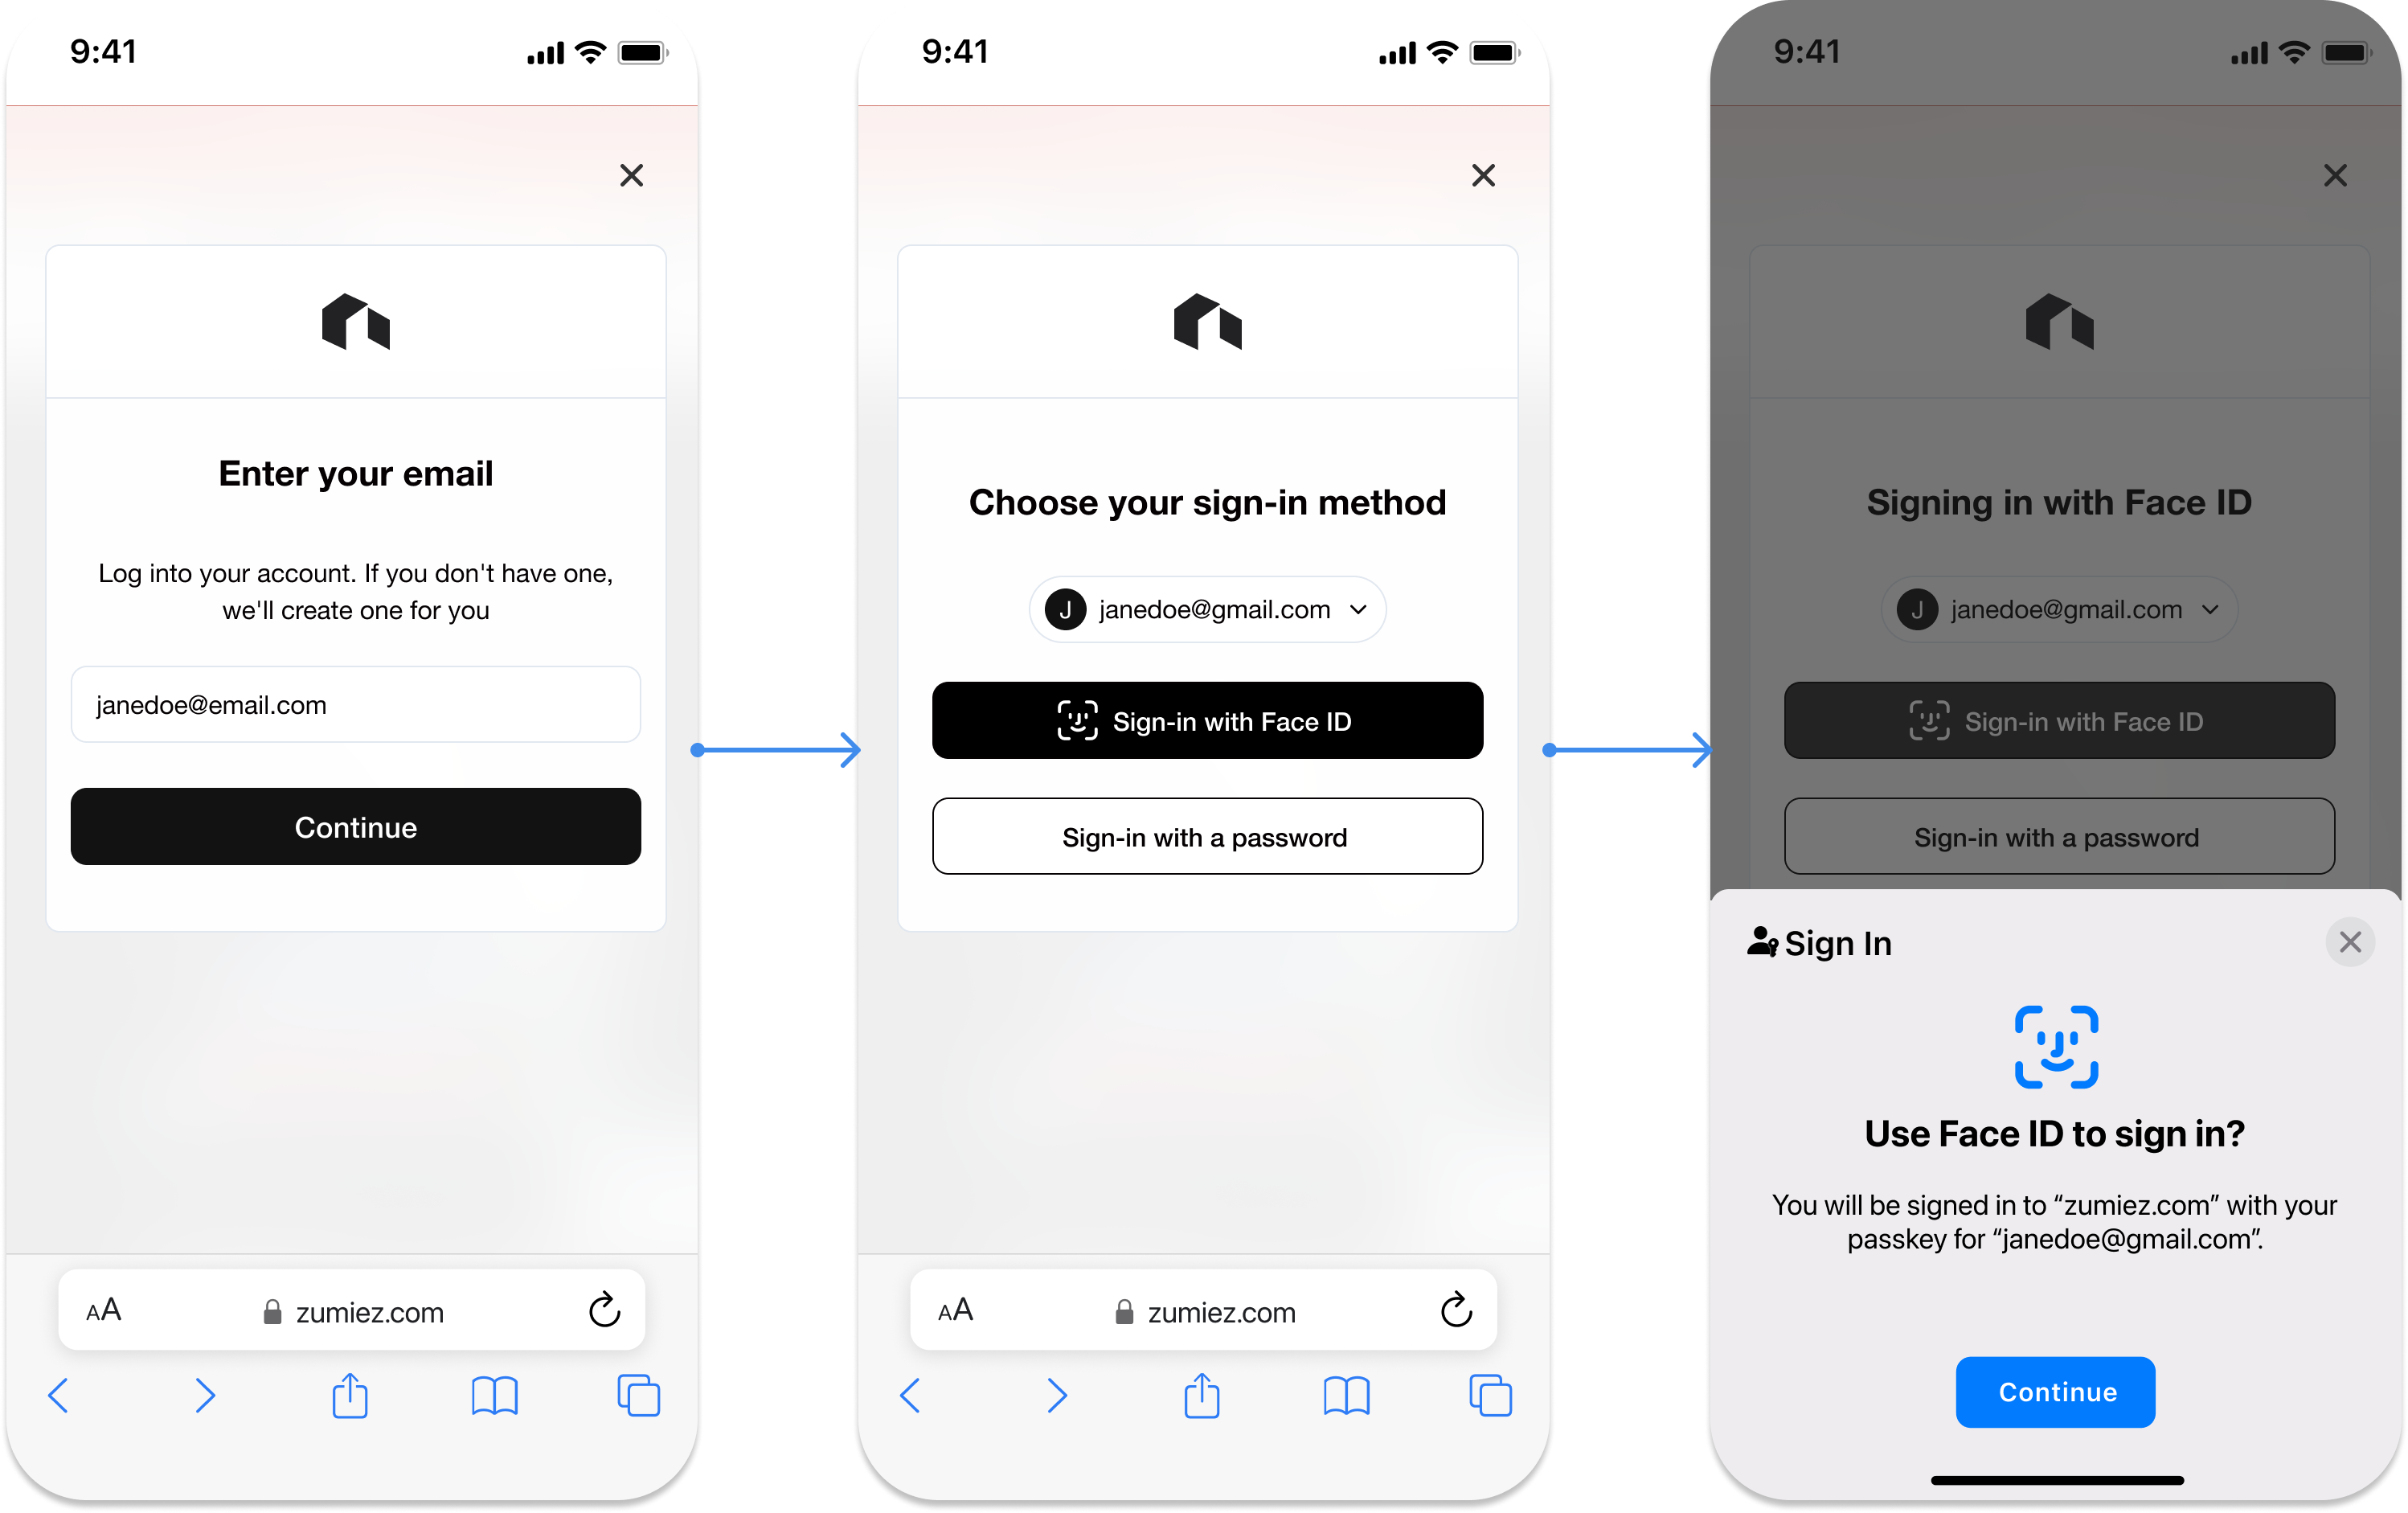 Figure 1. Authentication Experience (example)
## Prerequisites
To get the most out of this guide, make sure you've already completed the backend integrations as described in [Build Server-Side Endpoints](/building-blocks/build-server-endpoints).
## Install the OwnID SDK
```javascript React theme={null}
npm install @ownid/react
```
```javascript Angular theme={null}
npm install @ownid/angular
```
## Reference the OwnID SDK
Reference the SDK at the top of your web pages.
```javascript JavaScript theme={null}
```
```jsx React theme={null}
import { OwnIDInit } from '@ownid/react';
//place this component on the top level of the component hierarchy
//this component doesn't render to any visible UI
ReactDOM.render(
,
document.getElementById("root"),
);
```
```javascript Angular theme={null}
import { OwnidAngularModule } from '@ownid/angular';
@NgModule({
imports: [
OwnidAngularModule.forRoot({appId:'s9d8f7s98f79s87dfMyAppID'}),
]})
```
**Recommendations**
* Include the SDK on all pages, even those without user-facing authentication elements. Doing so will enable users to access additional functionality, wherever they are on your site.
* If you are using OwnID UAT environment, change the src to `https://cdn.uat.ownid.com/sdk/`
## Integration
The OwnID authentication is triggered using the `ownid('start')` method. This method initializes the authentication flow and provides various handlers to manage different aspects of the authentication process.
```javascript theme={null}
ownid('start', {
providers: {
session: {
create: async (data: any) => {
try {
// set user session using data.token (usually a jwt or session token), generated in your backend and sent through the OwnID server
await this.authService.onLogin(data);
return { status: 'logged-in' };
} catch (error) {
return { status: 'fail', reason: 'Failed to create session' };
}
},
},
events: {
onFinish: async () => ({ action: 'redirect', url: "/my-account" })
}
}
});
```
## Next Step
After understanding the basic steps of the integration, let's deep dive into the different configuration options.
Click here to move to the next step ->
Figure 1. Authentication Experience (example)
## Prerequisites
To get the most out of this guide, make sure you've already completed the backend integrations as described in [Build Server-Side Endpoints](/building-blocks/build-server-endpoints).
## Install the OwnID SDK
```javascript React theme={null}
npm install @ownid/react
```
```javascript Angular theme={null}
npm install @ownid/angular
```
## Reference the OwnID SDK
Reference the SDK at the top of your web pages.
```javascript JavaScript theme={null}
```
```jsx React theme={null}
import { OwnIDInit } from '@ownid/react';
//place this component on the top level of the component hierarchy
//this component doesn't render to any visible UI
ReactDOM.render(
,
document.getElementById("root"),
);
```
```javascript Angular theme={null}
import { OwnidAngularModule } from '@ownid/angular';
@NgModule({
imports: [
OwnidAngularModule.forRoot({appId:'s9d8f7s98f79s87dfMyAppID'}),
]})
```
**Recommendations**
* Include the SDK on all pages, even those without user-facing authentication elements. Doing so will enable users to access additional functionality, wherever they are on your site.
* If you are using OwnID UAT environment, change the src to `https://cdn.uat.ownid.com/sdk/`
## Integration
The OwnID authentication is triggered using the `ownid('start')` method. This method initializes the authentication flow and provides various handlers to manage different aspects of the authentication process.
```javascript theme={null}
ownid('start', {
providers: {
session: {
create: async (data: any) => {
try {
// set user session using data.token (usually a jwt or session token), generated in your backend and sent through the OwnID server
await this.authService.onLogin(data);
return { status: 'logged-in' };
} catch (error) {
return { status: 'fail', reason: 'Failed to create session' };
}
},
},
events: {
onFinish: async () => ({ action: 'redirect', url: "/my-account" })
}
}
});
```
## Next Step
After understanding the basic steps of the integration, let's deep dive into the different configuration options.
Click here to move to the next step ->