> ## Documentation Index
> Fetch the complete documentation index at: https://docs.ownid.com/llms.txt
> Use this file to discover all available pages before exploring further.
# Get Started
> Start here to build a user journey with the SDK
## Integration Overview
Three primary steps are required to implement OwnID journeys end-to-end.
[Set up your account](https://console.ownid.com/login), get your application id, and add a field to your user table to store OwnID data.
Add the three event handlers that manage requests to each of three end-points made by the OwnID server when it receives login events from your frontend.
Add our HTML JavaScript, templates, and the OwnID Password widget to build the login, registration, account recovery workflow and install the OwnID Password widget.
***
## Preparation
Before starting, create your account in the [OwnID Admin Console](https://console.ownid.com/login), register your base URL, and get your application id.
 1. **Create your App**\
Login to the OwnID Admin Console and follow the instructions to create an app. You will also be asked to define the `base URL` that OwnID will use to make requests to your web server. The console guides you through this process step by step.
1. **Create your App**\
Login to the OwnID Admin Console and follow the instructions to create an app. You will also be asked to define the `base URL` that OwnID will use to make requests to your web server. The console guides you through this process step by step.
 If you want to start with local development, you can create a tunnel to your localhost server using a tool like [ngrok](https://ngrok.com/download). For example: `https://84c5df474.ngrok-free.dev/api/ownid`
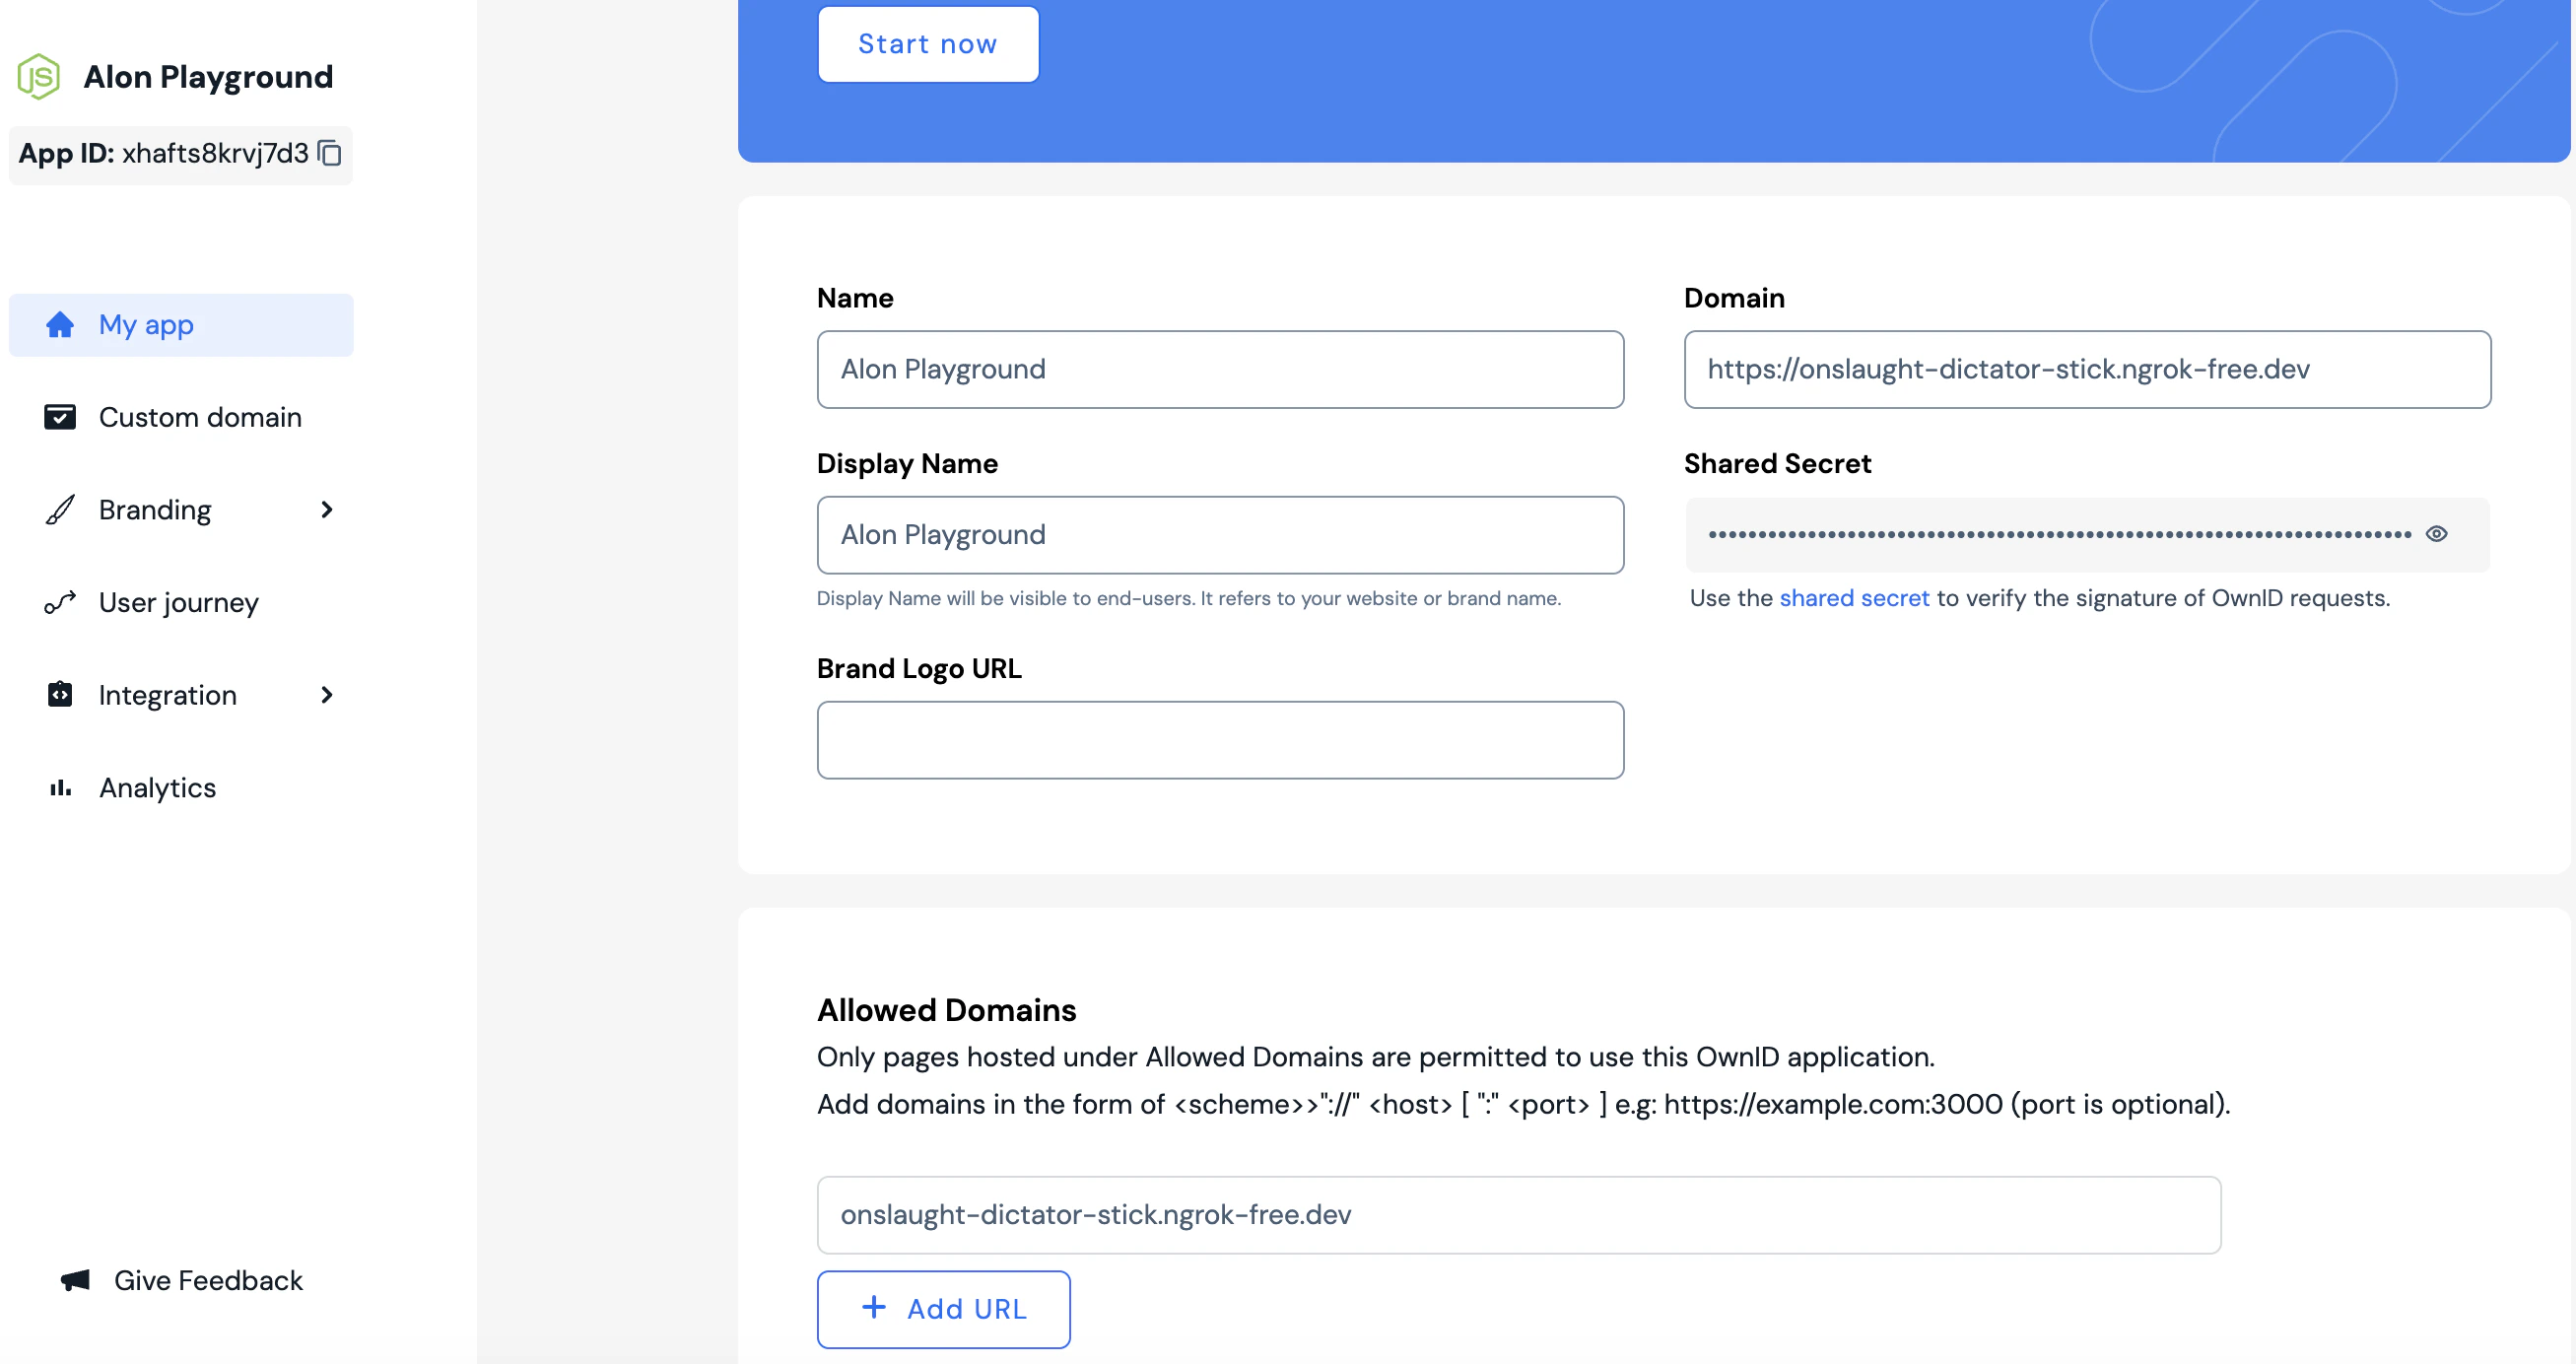
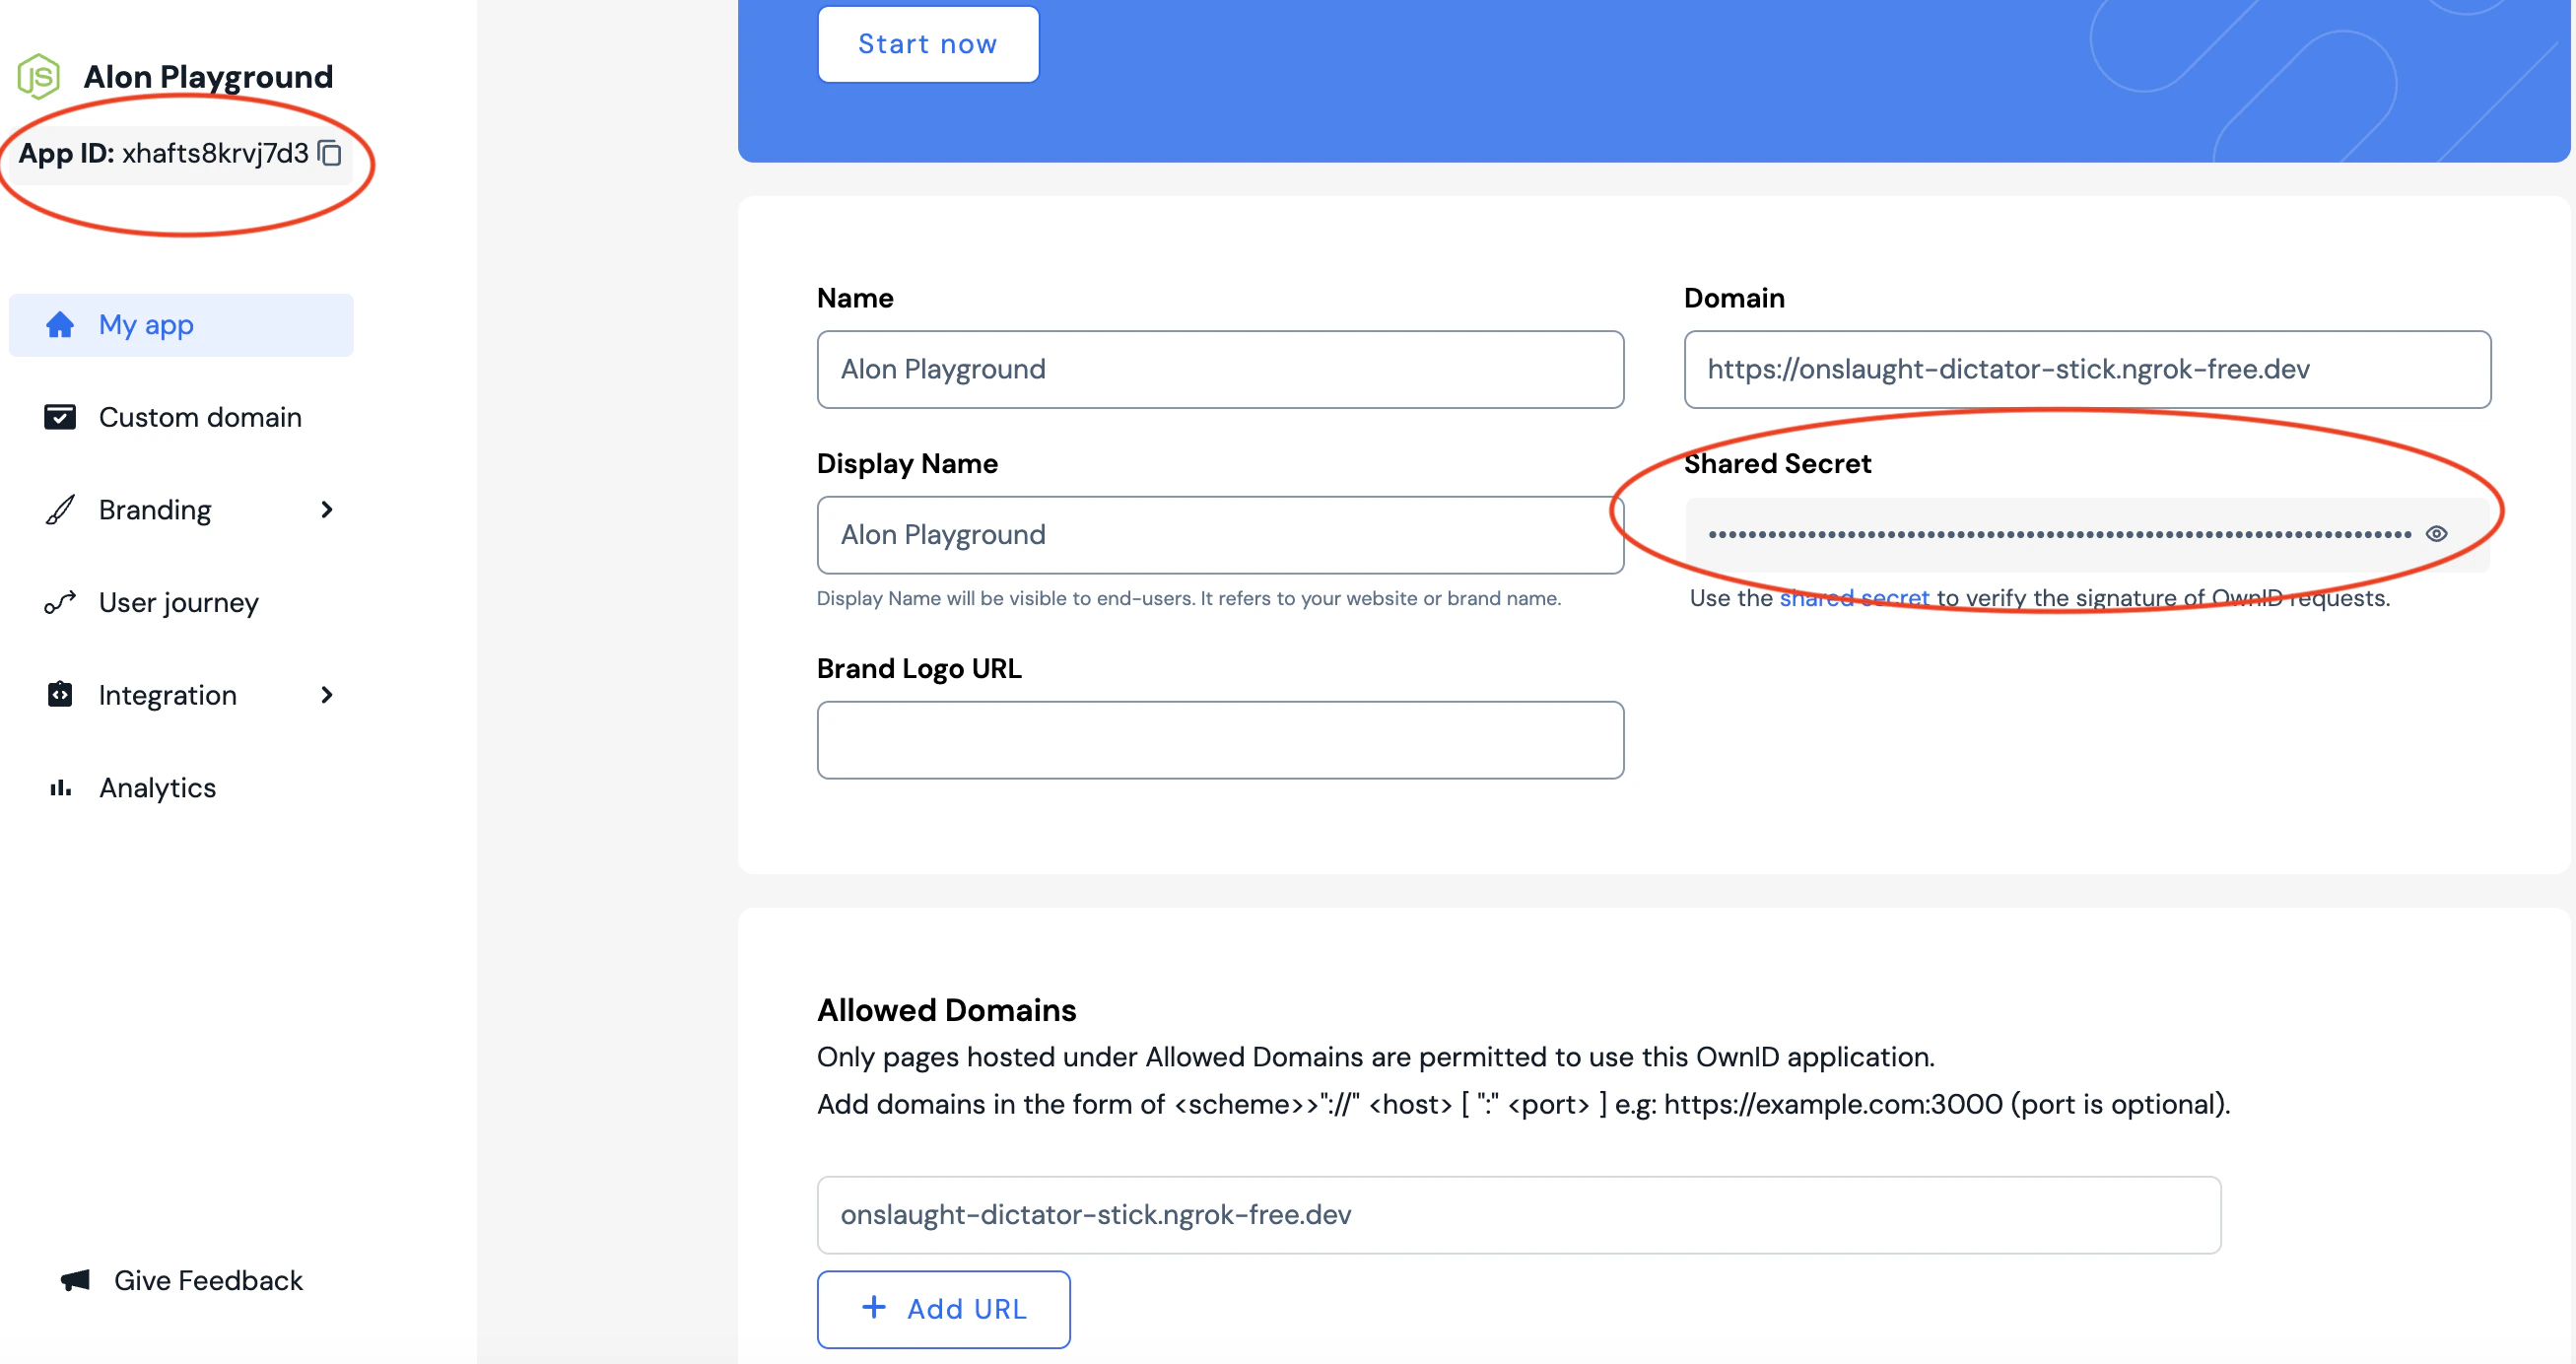
2. **Get Integration Credentials**\
On your app page in the console, copy the following parameters needed for integration:
* Your **application id** - *Use this also in data objects where specified by the* `appId` *field.*
* Your **shared secret** - *Use this to verify the signature in OwnID requests to your web server.*
If you want to start with local development, you can create a tunnel to your localhost server using a tool like [ngrok](https://ngrok.com/download). For example: `https://84c5df474.ngrok-free.dev/api/ownid`
2. **Get Integration Credentials**\
On your app page in the console, copy the following parameters needed for integration:
* Your **application id** - *Use this also in data objects where specified by the* `appId` *field.*
* Your **shared secret** - *Use this to verify the signature in OwnID requests to your web server.*
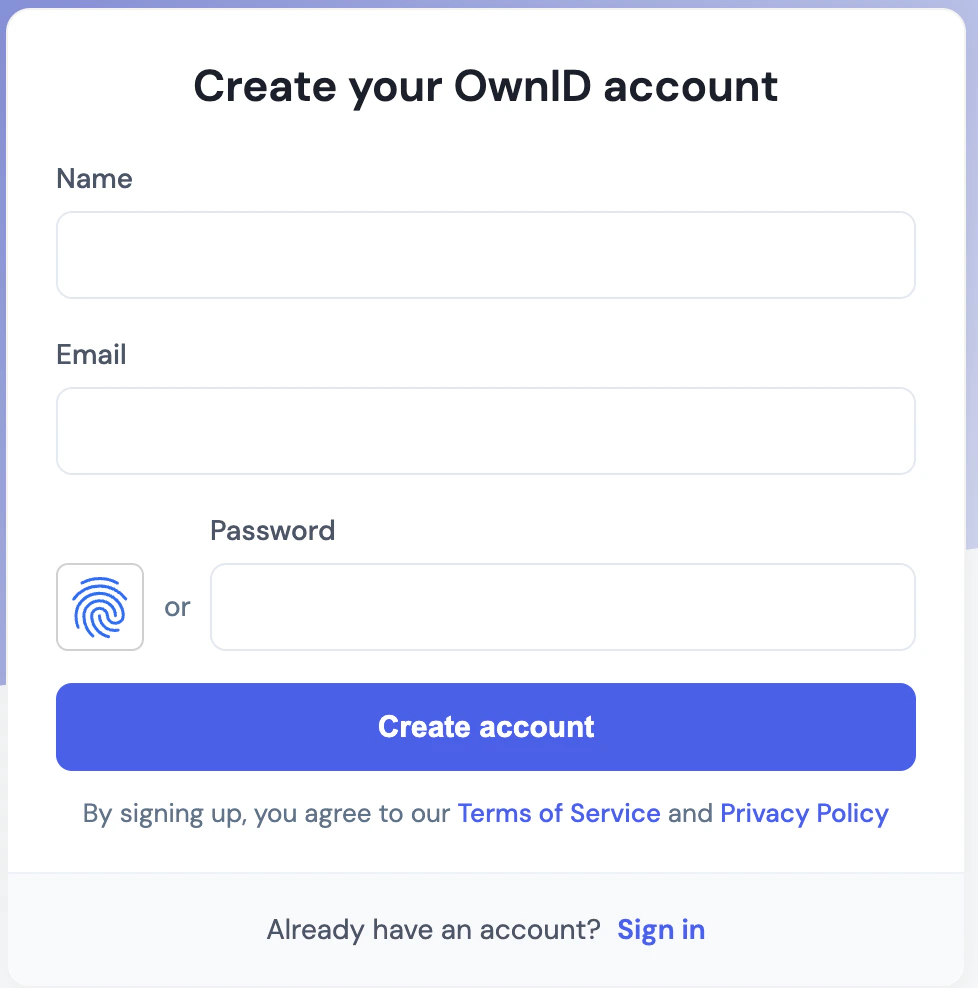
 3. **Create a VARCHAR field**\
Create a new character field called `ownIdData` in your user database. We'll use this field to store OwnID authentication data for registered users.
Be sure the `ownIdData` field meets the following requirements:
* A character datatype e.g., **VARCHAR**
* A minimum length of **5000 chars**
***
## Next Step
Before building frontend user journeys, you must add three request handlers to your web server.
OwnID provides templates for the three request handlers you'll host on your web server. These form the endpoints called from the OwnID platform.
3. **Create a VARCHAR field**\
Create a new character field called `ownIdData` in your user database. We'll use this field to store OwnID authentication data for registered users.
Be sure the `ownIdData` field meets the following requirements:
* A character datatype e.g., **VARCHAR**
* A minimum length of **5000 chars**
***
## Next Step
Before building frontend user journeys, you must add three request handlers to your web server.
OwnID provides templates for the three request handlers you'll host on your web server. These form the endpoints called from the OwnID platform.