> ## Documentation Index
> Fetch the complete documentation index at: https://docs.ownid.com/llms.txt
> Use this file to discover all available pages before exploring further.
# Configuring Custom SMS Provider
> Send phone verification messages through your server.
OwnID allows you to use your servers to integrate with your own SMS provider so you can manage, monitor, and troubleshoot SMS communications.
## Build Server-Side Endpoint
This endpoint handles a request to send an OTP to a specific phone number using your own SMS provider integration.
Implement this endpoint according to the specifications:
### Handle Requests
**Headers**
You might notice two values in request headers from the OwnID platform:
* `ownid-signature`
* `ownid-timestamp`
These are part of securing your integration.
To help ensure the integration and endpoints are secure, you must validate the signature of the requests as described in our [security page](/building-blocks/security).
**Payload**
OwnID will make requests to this endpoint with the following payload:
* `phoneNumber` - delivery phone number of the user.
* `messageText` - SMS message text according to what is defined in the SMS templates. Includes the OTP.
* `code` - the verification code included in the SMS message.
```json payload example theme={null}
{
"phoneNumber": "+1234567890",
"messageText": "Your verification code is 1234",
"code": "1234"
}
```
### Implement Responses
Implement this response for your endpoint:
| Status | Description | Return |
| ------ | ----------- | ----------------- |
| `202` | Accepted | return empty body |
## Console Configuration
To get started, go to the OwnID console and login to your account.
1. From the Apps page, click the app you want to configure for SMS verification.
2. Click the **User journey** link from the navigation panel.  3. In **Login identifier**, select **Phone number**. Click **Customize list of countries** if you need to control which phone number country codes users can select.
4. In the **OTP configuration** panel, select **SMS** under Delivery Channel.
5. Click the **Custom provider** bar.
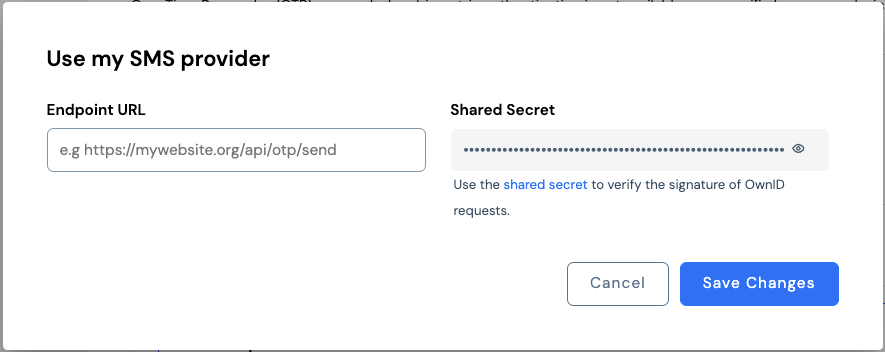
6. When the configuration form opens, enter the Endpoint URL. OwnID will use it to make requests to your web server.
7. Use the shared secret to verify the signature of OwnID requests.
3. In **Login identifier**, select **Phone number**. Click **Customize list of countries** if you need to control which phone number country codes users can select.
4. In the **OTP configuration** panel, select **SMS** under Delivery Channel.
5. Click the **Custom provider** bar.
6. When the configuration form opens, enter the Endpoint URL. OwnID will use it to make requests to your web server.
7. Use the shared secret to verify the signature of OwnID requests.
 1. Click **Save Changes**.
Test your configuration by running through a login workflow with a phone number on a device without biometric verification.
Be sure to complete the SMS provider configuration for all your apps before deployment.
1. Click **Save Changes**.
Test your configuration by running through a login workflow with a phone number on a device without biometric verification.
Be sure to complete the SMS provider configuration for all your apps before deployment.