> ## Documentation Index
> Fetch the complete documentation index at: https://docs.ownid.com/llms.txt
> Use this file to discover all available pages before exploring further.
# Okta
> Integrate OwnID password free authentication into your Okta flow
By integrating Okta with OwnID, you can implement the full set of OwnID features to simplify and streamline your user login experience.
## How it Works
OwnID supports integration with Okta through our pre-built Okta Connector.
Configuration on the Okta side happens through your Okta Admin Dashboard. Ensure you have an account with admin access in Okta.
Complete these five basic steps to integrate OwnID with Okta:
**Step 1** - Extend Okta User Schema.
**Step 2** - Create Okta API Token.
**Step 3** - Create the OwnID App.
**Step 4** - Create an Identity Provider.
**Step 5** - Frontend Integration.
## Step 1 - Extend Okta User Schema
Add an attribute in Okta called `ownIdData`. This is used to store user authentication data *in Okta*.
1. In your Okta Admin Dashboard go to *Directory -> Profile Editor*.
2. Select the User (default) user group.  Figure 1. Profile editor
3. Click **+Add Attribute**.
Figure 1. Profile editor
3. Click **+Add Attribute**.  Figure 2. Add attribute
4. Complete the attribute configuration as shown below.
Figure 2. Add attribute
4. Complete the attribute configuration as shown below.  Figure 3. Attribute configuration
5. Click **Save**.
**Securing User's Personal Data**
OwnID does not store or process any user data. Users' public keys and device information are stored on your platform.
Private keys are kept exclusively on the user's device and are never transmitted elsewhere.
## Step 2 - Create Okta API Token
1. In your Okta Admin Dashboard, go to: *Security -> API -> Tokens* tab.
2. Click **Create Token**.
Figure 3. Attribute configuration
5. Click **Save**.
**Securing User's Personal Data**
OwnID does not store or process any user data. Users' public keys and device information are stored on your platform.
Private keys are kept exclusively on the user's device and are never transmitted elsewhere.
## Step 2 - Create Okta API Token
1. In your Okta Admin Dashboard, go to: *Security -> API -> Tokens* tab.
2. Click **Create Token**.  Figure 4. Create API token
3. Fill in the token name - "OwnID API Token".
4. Copy the token value. We will use it in the next step.
Figure 4. Create API token
3. Fill in the token name - "OwnID API Token".
4. Copy the token value. We will use it in the next step.  Figure 5. Copy API token
5. Click **OK, got it** after copying the token.
## Step 3 - Create the OwnID App
We'll create a new OwnID app using the Okta Connector.
Figure 5. Copy API token
5. Click **OK, got it** after copying the token.
## Step 3 - Create the OwnID App
We'll create a new OwnID app using the Okta Connector.
 An OwnID App is what connects the existing identity provider used by your website with the OwnID widget you insert on the front end.
 OwnID widget
Each of your OwnID Apps acts as the central point of configuration for each of your integrations. These no-code Apps are created, hosted, and maintained entirely within the OwnID Console environment.
When you create an App, it's assigned a unique `appId` automatically. Use that `appId` in OwnID SDK interaction from your website’s front end.
#### To Create an OwnID App
1. Login to the [OwnID Console](https://console.ownid.com) (or create your account).
2. Click **+Create Application** from the Apps screen.
3. Enter a name for your application in the *App name* field.
4. From the *Choose your integration* panel, select the *Okta* tile.
OwnID widget
Each of your OwnID Apps acts as the central point of configuration for each of your integrations. These no-code Apps are created, hosted, and maintained entirely within the OwnID Console environment.
When you create an App, it's assigned a unique `appId` automatically. Use that `appId` in OwnID SDK interaction from your website’s front end.
#### To Create an OwnID App
1. Login to the [OwnID Console](https://console.ownid.com) (or create your account).
2. Click **+Create Application** from the Apps screen.
3. Enter a name for your application in the *App name* field.
4. From the *Choose your integration* panel, select the *Okta* tile. 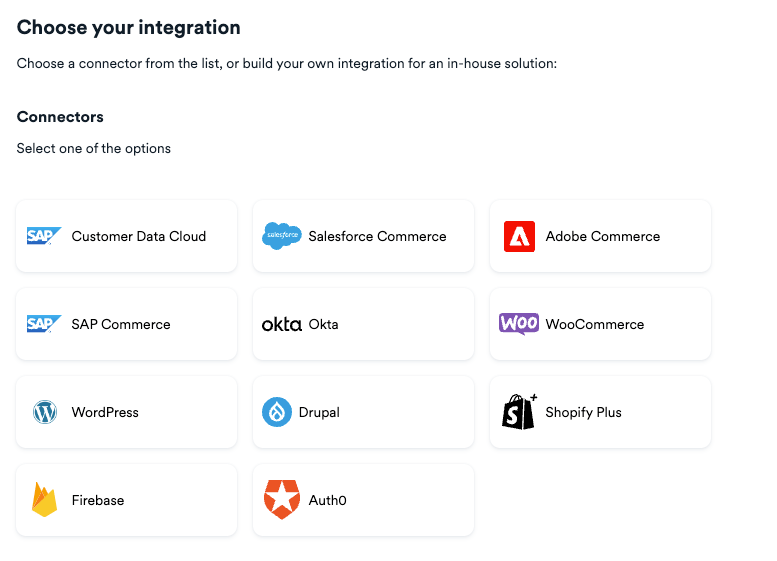 5. Click **Next**.
6. Click **Explore my App** on the "Congratulations" popup.
5. Click **Next**.
6. Click **Explore my App** on the "Congratulations" popup.  #### Set Okta Integration Parameters
In your Okta integration page, fill in the following information:
1. In *Okta Settings*, set the **Site Domain** - *e.g: [https://acme.okta.com](https://acme.okta.com)*
2. In *Okta Settings*, set the **API Token** value you created above.
3. In *Okta Settings*, skip the **Identity Provider ID** for now. We will get this in a later step.
#### Set Okta Integration Parameters
In your Okta integration page, fill in the following information:
1. In *Okta Settings*, set the **Site Domain** - *e.g: [https://acme.okta.com](https://acme.okta.com)*
2. In *Okta Settings*, set the **API Token** value you created above.
3. In *Okta Settings*, skip the **Identity Provider ID** for now. We will get this in a later step.  4. In *OpenID Connect settings*, set **Redirect URIs** by adding one or more Okta redirect URIs, typically in the format `https://your-auth-domain.com/oauth2/v1/authorize/callback`.
  5. Click **Save Changes**.
The other values in this page will be used in the next step.
## Step 4 - Create an Identity Provider
Create an OwnID OIDC Identity Provider.
1. In your Okta Admin Dashboard, go to *Security -> Identity providers*.
2. Click **Add identity provider**.
5. Click **Save Changes**.
The other values in this page will be used in the next step.
## Step 4 - Create an Identity Provider
Create an OwnID OIDC Identity Provider.
1. In your Okta Admin Dashboard, go to *Security -> Identity providers*.
2. Click **Add identity provider**.  Figure 6. Add identity provider
3. From the provider options, select the *OpenID Connect IdP* tile.
Figure 6. Add identity provider
3. From the provider options, select the *OpenID Connect IdP* tile.  Figure 7. OpenID Connect IdP
4. The *General settings* form opens. Configure it with the following general settings:
Figure 7. OpenID Connect IdP
4. The *General settings* form opens. Configure it with the following general settings:  Figure 8. IdP settings
5. For the *Client details* values use the `Client ID` and `Client Secret` from the OwnID application created in the previous step as shown.
Figure 8. IdP settings
5. For the *Client details* values use the `Client ID` and `Client Secret` from the OwnID application created in the previous step as shown.  Figure 9. Client details
6. **In *Endpoints*, enter the values from the OwnID application created in the previous step?**
7. Set the remaining details as shown below:
Figure 9. Client details
6. **In *Endpoints*, enter the values from the OwnID application created in the previous step?**
7. Set the remaining details as shown below:  Figure 10. Authentication settings
8. Click **Save**.
Be sure to copy the `IdP ID` value from the *Summary*\_ so we can use it in the next step.
Figure 10. Authentication settings
8. Click **Save**.
Be sure to copy the `IdP ID` value from the *Summary*\_ so we can use it in the next step.  Figure 11. IdP Summary
## Step 5 - Frontend Integration
1. In your Okta Admin Dashboard, go to *Customizations -> Brands*.
2. Select your relevant brand.
3. Click **Customize** on the *Sign-in page* panel.
Figure 11. IdP Summary
## Step 5 - Frontend Integration
1. In your Okta Admin Dashboard, go to *Customizations -> Brands*.
2. Select your relevant brand.
3. Click **Customize** on the *Sign-in page* panel.  Figure 12. Brand customization in Okta
4. Ensure the **Code Editor** option is toggled *on* (requires a custom domain).
Figure 12. Brand customization in Okta
4. Ensure the **Code Editor** option is toggled *on* (requires a custom domain).  Figure 13. Code editor
5. Under the `` tag, locate the `{{{OktaUtil}}}` definition, then add the OwnID script for loading the OwnID WebSDK below the `OktaUtil` line.
Figure 13. Code editor
5. Under the `` tag, locate the `{{{OktaUtil}}}` definition, then add the OwnID script for loading the OwnID WebSDK below the `OktaUtil` line.  The script could be fetched from the integration settings of the app in the OwnID Console. Once you fill in the *Identity Provider ID* created in the previous step, you will have a full snippet ready to copy.
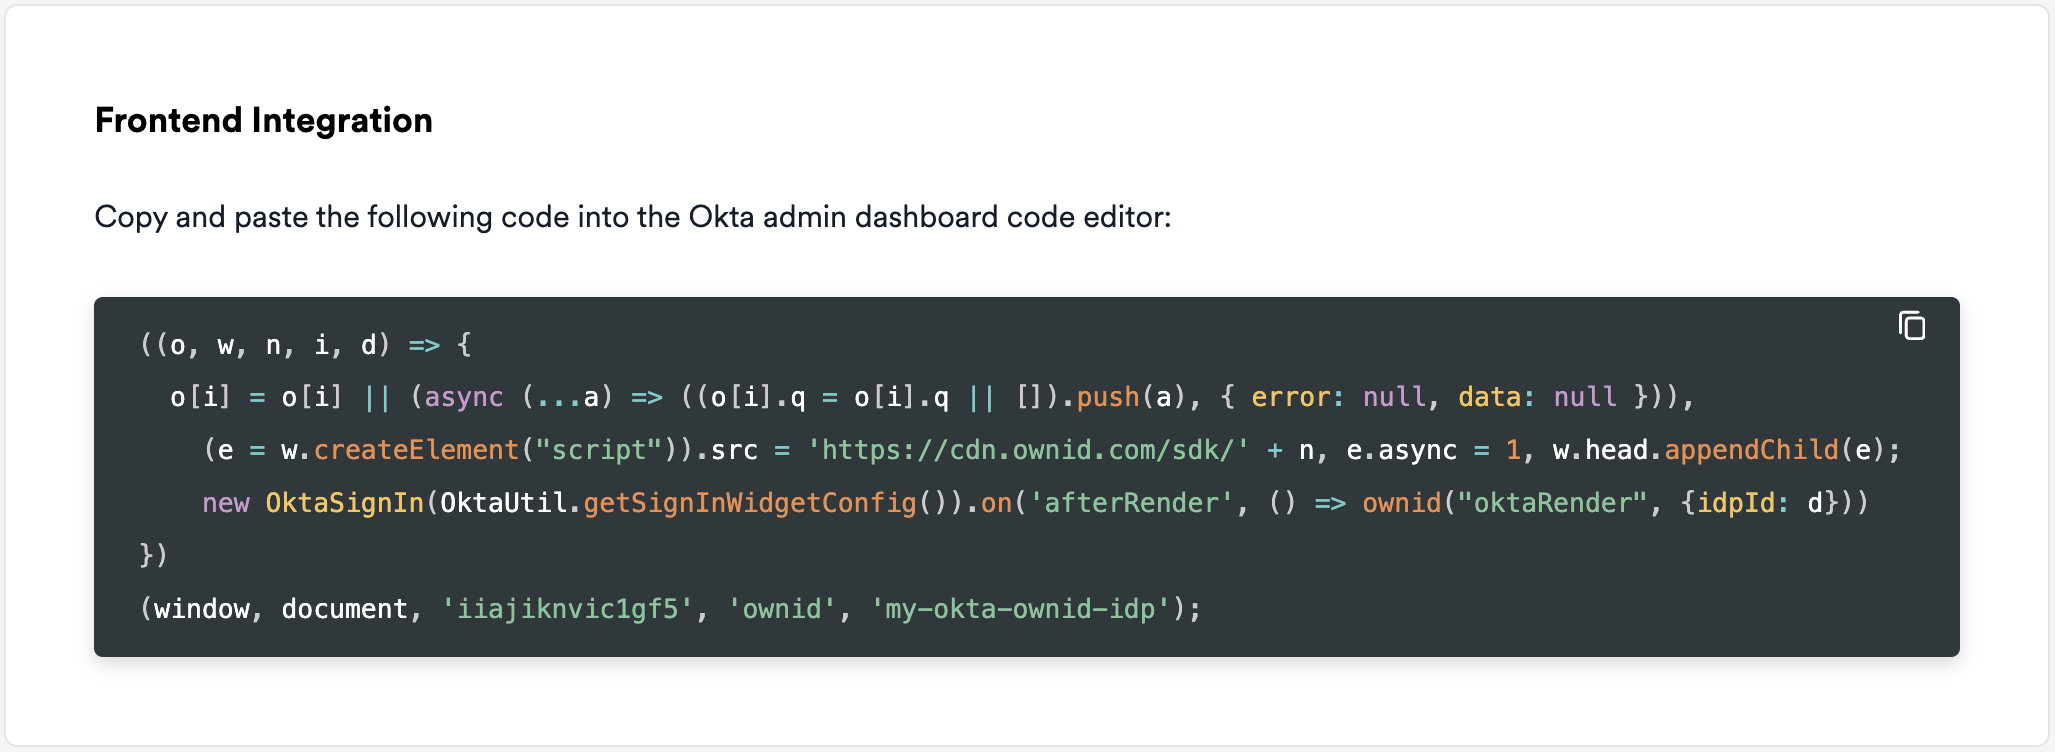 Alternatively, you can use the following snippet and fill in the placeholders:
* Replace `` with the `appId` from the OwnID application created in step 3.
* Replace `` with the `IdP ID` from step 4.
```javascript Web SDK Configuration theme={null}
((o, w, n, i, d) => {
o[i] = o[i] || (async (...a) => ((o[i].q = o[i].q || []).push(a), { error: null, data: null })),
(e = w.createElement("script")).src = 'https://cdn.ownid.com/sdk/' + n, e.async = 1, w.head.appendChild(e);
new OktaSignIn(OktaUtil.getSignInWidgetConfig()).on('afterRender', c => ownid("oktaRender", {idpId: d, context: c}))
})
(window, document, '', 'ownid', '');
```
6. Click **Save and Publish**.
**Congratulations!**\
Enjoy your Okta-integrated passwordless authentication!
## Next Steps
### Ready to deploy?
Take me to the Deployment Checklist
Alternatively, you can use the following snippet and fill in the placeholders:
* Replace `` with the `appId` from the OwnID application created in step 3.
* Replace `` with the `IdP ID` from step 4.
```javascript Web SDK Configuration theme={null}
((o, w, n, i, d) => {
o[i] = o[i] || (async (...a) => ((o[i].q = o[i].q || []).push(a), { error: null, data: null })),
(e = w.createElement("script")).src = 'https://cdn.ownid.com/sdk/' + n, e.async = 1, w.head.appendChild(e);
new OktaSignIn(OktaUtil.getSignInWidgetConfig()).on('afterRender', c => ownid("oktaRender", {idpId: d, context: c}))
})
(window, document, '', 'ownid', '');
```
6. Click **Save and Publish**.
**Congratulations!**\
Enjoy your Okta-integrated passwordless authentication!
## Next Steps
### Ready to deploy?
Take me to the Deployment Checklist