> ## Documentation Index
> Fetch the complete documentation index at: https://docs.ownid.com/llms.txt
> Use this file to discover all available pages before exploring further.
# Passkey setup
> Associate your native Android or iOS app with its relying party domain and configure passkeys in the OwnID Console.
Passkeys require a verified association between your native app and its relying party domain. Configure the platform association file, app signing, and the OwnID Console before adding an authentication or enrollment flow.
OwnID Android SDK supports API 23+, but Android passkeys require API 28+.
OwnID iOS SDK supports iOS 13+, but passkeys require iOS 16+.
## Configure your platform
OwnID uses Android Credential Manager for passkey creation and authentication.
Use the current AndroidX Credentials version for both artifacts:
Latest stable AndroidX Credentials version
 ```kotlin build.gradle.kts theme={null}
dependencies {
implementation("androidx.credentials:credentials:")
implementation("androidx.credentials:credentials-play-services-auth:")
}
```
See the [AndroidX Credentials release notes](https://developer.android.com/jetpack/androidx/releases/credentials) for version-specific changes.
Host `assetlinks.json` at this exact URL:
```text theme={null}
https:///.well-known/assetlinks.json
```
The endpoint must be public over HTTPS, return `HTTP 200` with a JSON content type, and must not redirect. Allow automated retrieval of `/.well-known/assetlinks.json`; if the domain uses `robots.txt`, make sure it does not block `/.well-known/`.
```json assetlinks.json theme={null}
[
{
"relation": [
"delegate_permission/common.handle_all_urls",
"delegate_permission/common.get_login_creds"
],
"target": {
"namespace": "android_app",
"package_name": "",
"sha256_cert_fingerprints": [
""
]
}
}
]
```
Add an entry for every application ID and SHA-256 signing certificate that should use passkeys, including relevant debug, release, and product-flavor builds.
You can inspect a keystore certificate with:
```bash theme={null}
keytool -list -v -keystore
```
See Android's [Credential Manager prerequisites](https://developer.android.com/identity/credential-manager/prerequisites) and [Digital Asset Links guidance](https://developers.google.com/digital-asset-links) for validation requirements.
OwnID uses Apple's AuthenticationServices framework for passkey creation and authentication.
In Xcode, open your app target, select **Signing & Capabilities**, and add **Associated Domains**. Add the relying party domain without a protocol or path:
```text theme={null}
webcredentials:
```
```kotlin build.gradle.kts theme={null}
dependencies {
implementation("androidx.credentials:credentials:")
implementation("androidx.credentials:credentials-play-services-auth:")
}
```
See the [AndroidX Credentials release notes](https://developer.android.com/jetpack/androidx/releases/credentials) for version-specific changes.
Host `assetlinks.json` at this exact URL:
```text theme={null}
https:///.well-known/assetlinks.json
```
The endpoint must be public over HTTPS, return `HTTP 200` with a JSON content type, and must not redirect. Allow automated retrieval of `/.well-known/assetlinks.json`; if the domain uses `robots.txt`, make sure it does not block `/.well-known/`.
```json assetlinks.json theme={null}
[
{
"relation": [
"delegate_permission/common.handle_all_urls",
"delegate_permission/common.get_login_creds"
],
"target": {
"namespace": "android_app",
"package_name": "",
"sha256_cert_fingerprints": [
""
]
}
}
]
```
Add an entry for every application ID and SHA-256 signing certificate that should use passkeys, including relevant debug, release, and product-flavor builds.
You can inspect a keystore certificate with:
```bash theme={null}
keytool -list -v -keystore
```
See Android's [Credential Manager prerequisites](https://developer.android.com/identity/credential-manager/prerequisites) and [Digital Asset Links guidance](https://developers.google.com/digital-asset-links) for validation requirements.
OwnID uses Apple's AuthenticationServices framework for passkey creation and authentication.
In Xcode, open your app target, select **Signing & Capabilities**, and add **Associated Domains**. Add the relying party domain without a protocol or path:
```text theme={null}
webcredentials:
```
 Enable **Associated Domains** for the matching App ID in Apple Developer as well. If the app uses manual signing, regenerate and install its provisioning profiles after enabling the capability.
Host the extensionless file at this exact URL:
```text theme={null}
https:///.well-known/apple-app-site-association
```
The endpoint must be public over HTTPS, return `HTTP 200` with a JSON content type, must not redirect, and its uncompressed content must stay at or below 128 KB.
```json apple-app-site-association theme={null}
{
"webcredentials": {
"apps": [
"."
]
}
}
```
Add every app target that should use passkeys. Each `.` value must match the signed app's `application-identifier` entitlement.
The App ID prefix is often your Apple Team ID, but it can differ. Use the prefix from the signed app or provisioning profile.
See Apple's [Supporting associated domains](https://developer.apple.com/documentation/xcode/supporting-associated-domains) and [Associated Domains entitlement](https://developer.apple.com/documentation/bundleresources/entitlements/com.apple.developer.associated-domains) references for signing and validation requirements.
## Configure the OwnID Console
Use the Android application ID and signing certificate fingerprint or iOS bundle ID that corresponds to the values in each association file.
Sign in to the [OwnID Console](https://console.ownid.com/), open your application, and go to **Integration > Native Apps**.
Enable **Associated Domains** for the matching App ID in Apple Developer as well. If the app uses manual signing, regenerate and install its provisioning profiles after enabling the capability.
Host the extensionless file at this exact URL:
```text theme={null}
https:///.well-known/apple-app-site-association
```
The endpoint must be public over HTTPS, return `HTTP 200` with a JSON content type, must not redirect, and its uncompressed content must stay at or below 128 KB.
```json apple-app-site-association theme={null}
{
"webcredentials": {
"apps": [
"."
]
}
}
```
Add every app target that should use passkeys. Each `.` value must match the signed app's `application-identifier` entitlement.
The App ID prefix is often your Apple Team ID, but it can differ. Use the prefix from the signed app or provisioning profile.
See Apple's [Supporting associated domains](https://developer.apple.com/documentation/xcode/supporting-associated-domains) and [Associated Domains entitlement](https://developer.apple.com/documentation/bundleresources/entitlements/com.apple.developer.associated-domains) references for signing and validation requirements.
## Configure the OwnID Console
Use the Android application ID and signing certificate fingerprint or iOS bundle ID that corresponds to the values in each association file.
Sign in to the [OwnID Console](https://console.ownid.com/), open your application, and go to **Integration > Native Apps**.
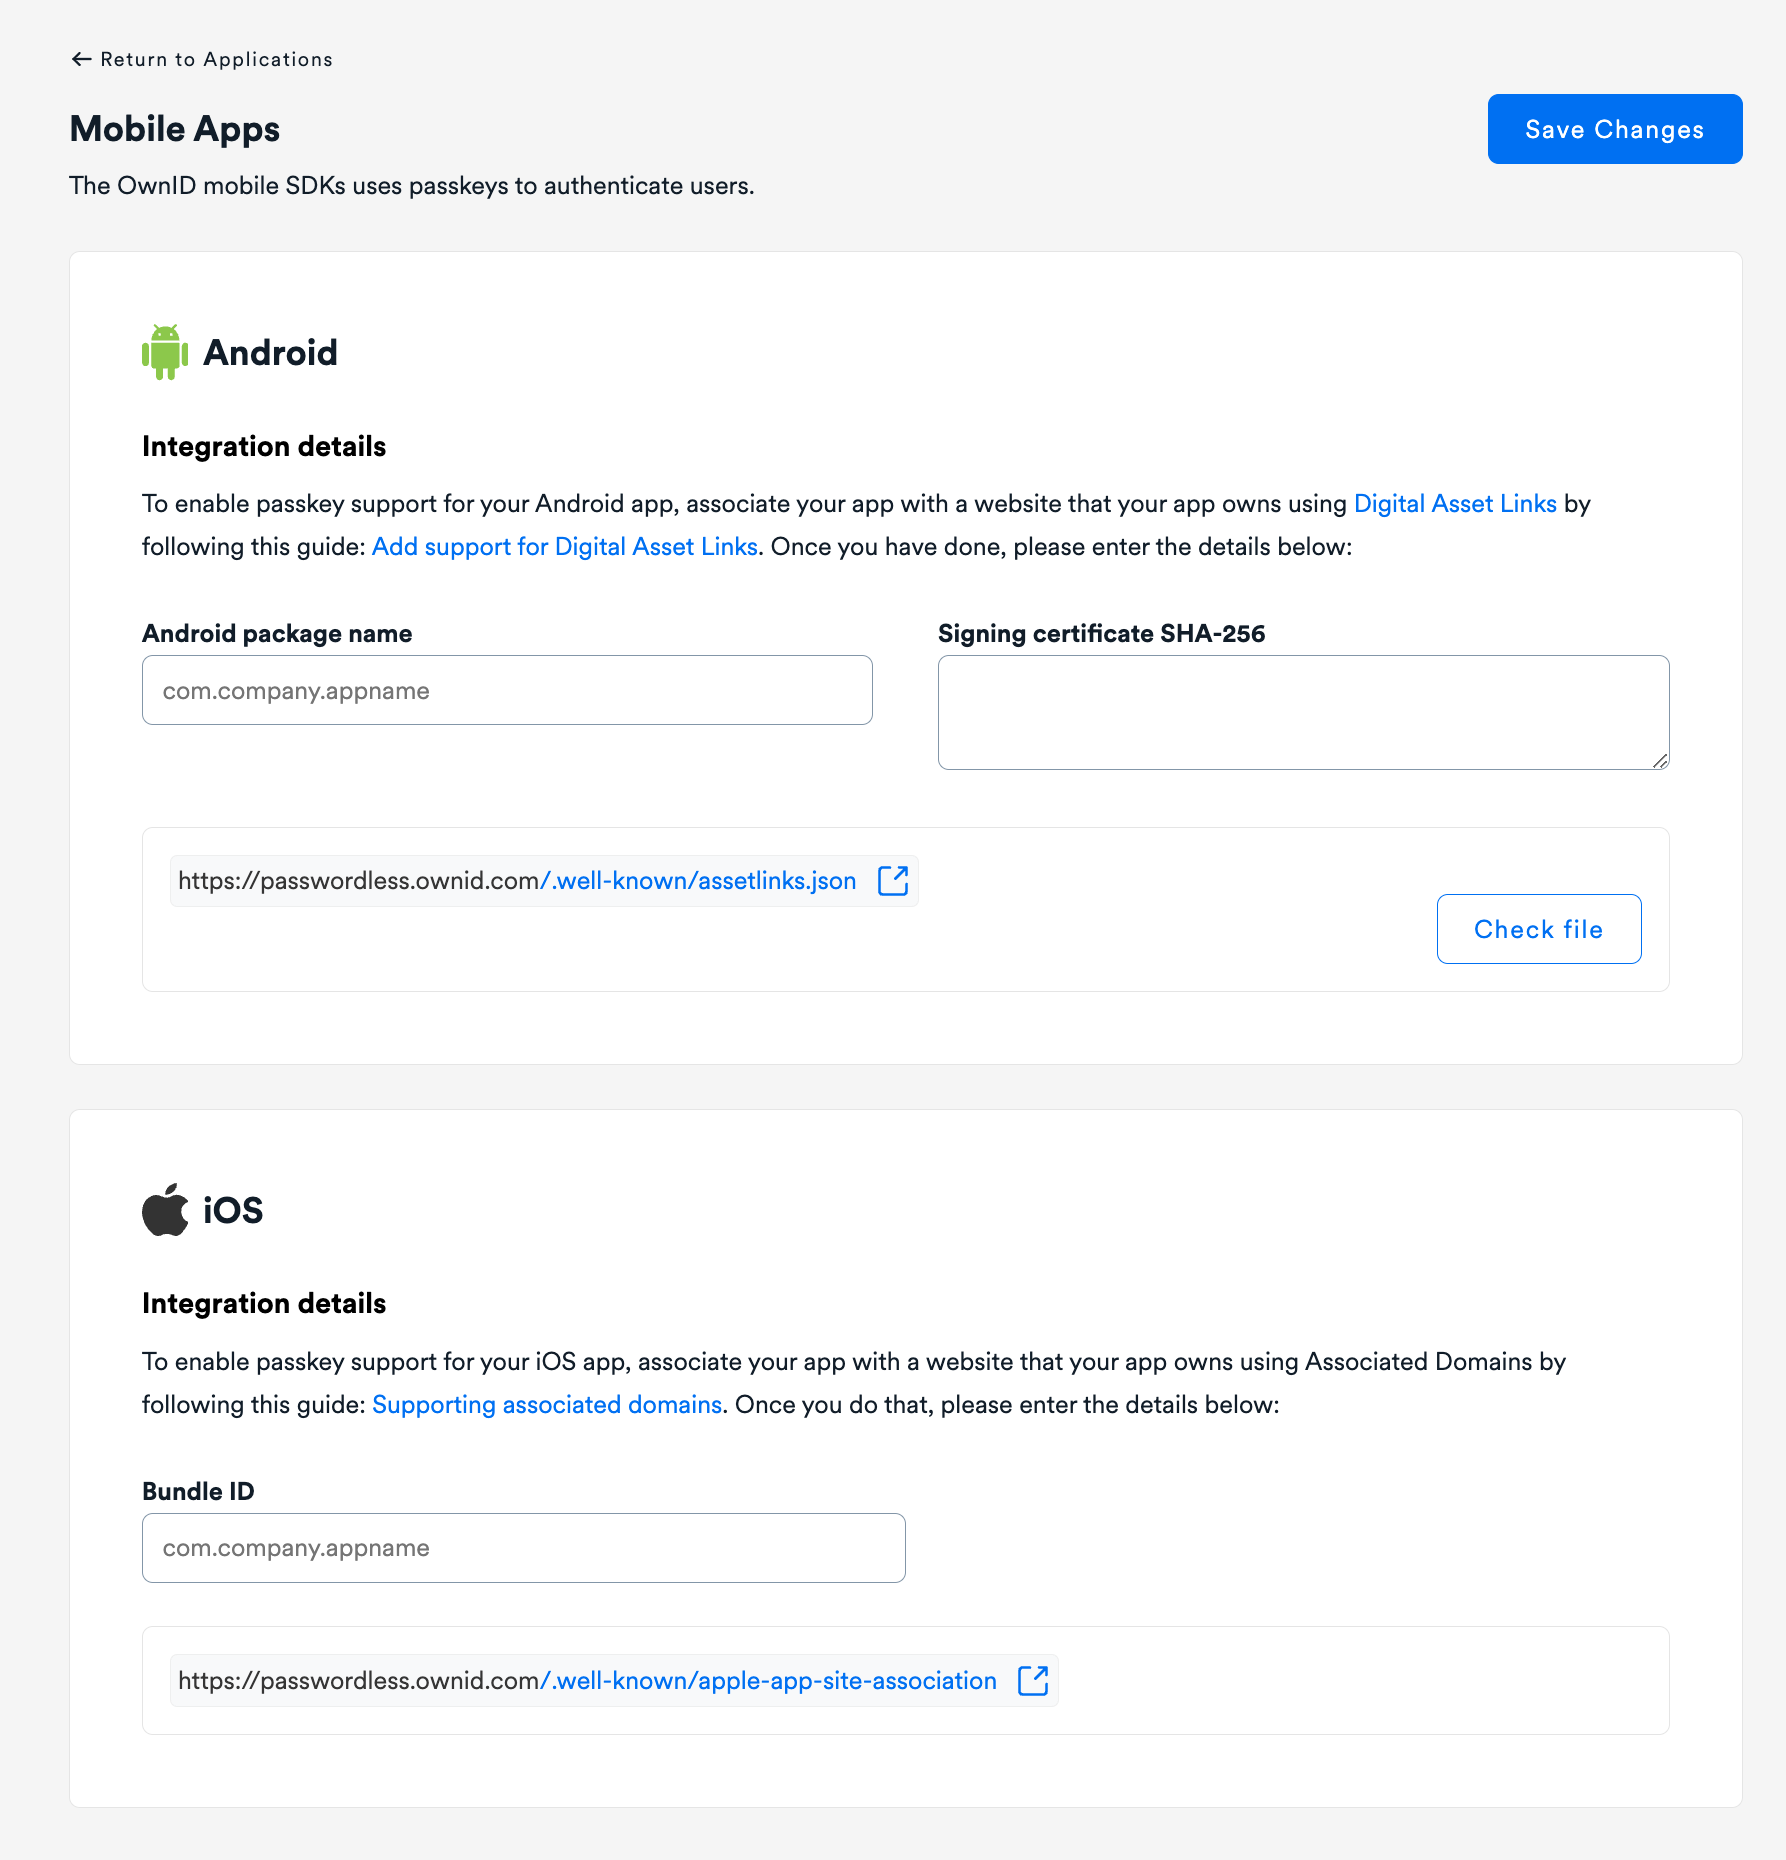 Enter the Android application ID and SHA-256 signing certificate fingerprint. They must match an entry in `assetlinks.json`.
Enter the iOS bundle identifier. It must match the bundle ID used in the Apple App Site Association file and the signed app.
Save your changes before testing passkey creation or authentication.
## Verify the association
* Fetch each association URL directly and confirm it returns the expected JSON with `HTTP 200` and no redirect. For Android, also confirm automated retrieval is not blocked by `robots.txt`.
* Confirm the Android application ID and certificate fingerprints match the installed build.
* Confirm the iOS bundle ID, App ID prefix, Apple Developer App ID capability, provisioning profile, and signed Associated Domains entitlement match.
* Test with a passkey-capable OS version and a real relying party domain.
For complete platform setup and troubleshooting, see the [Android SDK passkey guide](https://github.com/OwnID/ownid-android-sdk/blob/master/README.md#enable-passkeys) or [iOS SDK passkey guide](https://github.com/OwnID/ownid-ios-sdk/blob/master/README.md#enable-passkeys).
Enter the Android application ID and SHA-256 signing certificate fingerprint. They must match an entry in `assetlinks.json`.
Enter the iOS bundle identifier. It must match the bundle ID used in the Apple App Site Association file and the signed app.
Save your changes before testing passkey creation or authentication.
## Verify the association
* Fetch each association URL directly and confirm it returns the expected JSON with `HTTP 200` and no redirect. For Android, also confirm automated retrieval is not blocked by `robots.txt`.
* Confirm the Android application ID and certificate fingerprints match the installed build.
* Confirm the iOS bundle ID, App ID prefix, Apple Developer App ID capability, provisioning profile, and signed Associated Domains entitlement match.
* Test with a passkey-capable OS version and a real relying party domain.
For complete platform setup and troubleshooting, see the [Android SDK passkey guide](https://github.com/OwnID/ownid-android-sdk/blob/master/README.md#enable-passkeys) or [iOS SDK passkey guide](https://github.com/OwnID/ownid-ios-sdk/blob/master/README.md#enable-passkeys).