> ## Documentation Index
> Fetch the complete documentation index at: https://docs.ownid.com/llms.txt
> Use this file to discover all available pages before exploring further.
# Apple Sign-in
> Integrate Apple Sign-In into your OwnID authentication screens
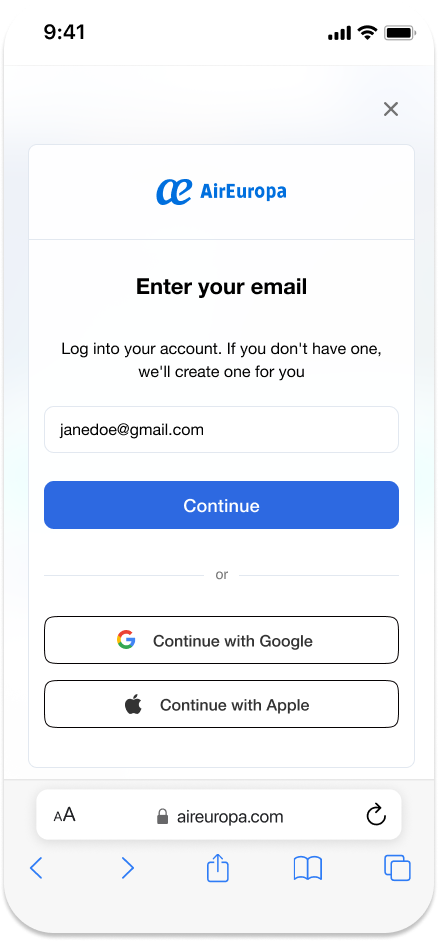 This guide walks you through the steps to set up Apple Sign-In as an identity provider within the OwnID platform, offering a secure and frictionless login experience.
## Prerequisites
Before you begin, ensure you have the following:
* An Apple developer account and access to [Apple Developer Console](https://developer.apple.com/).
* An OwnID account and access to the [OwnID Console](https://console.ownid.com/).
## Step 1 - Setup sign in with Apple on Apple Developer
1. Open the [Certificates, Identifiers & Profiles page](https://developer.apple.com/account/resources).
2. Click *Identifiers* in the sidebar, then click the add button (+) on the top left.
This guide walks you through the steps to set up Apple Sign-In as an identity provider within the OwnID platform, offering a secure and frictionless login experience.
## Prerequisites
Before you begin, ensure you have the following:
* An Apple developer account and access to [Apple Developer Console](https://developer.apple.com/).
* An OwnID account and access to the [OwnID Console](https://console.ownid.com/).
## Step 1 - Setup sign in with Apple on Apple Developer
1. Open the [Certificates, Identifiers & Profiles page](https://developer.apple.com/account/resources).
2. Click *Identifiers* in the sidebar, then click the add button (+) on the top left.
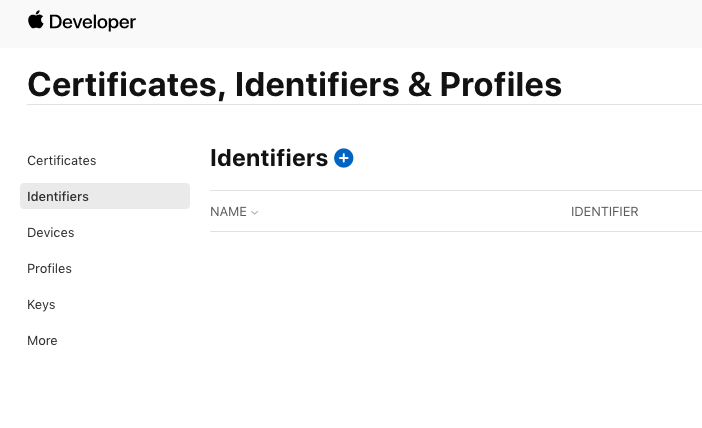 Figure 1. Identifiers
3. Select *App IDs*, then click Continue.
Figure 1. Identifiers
3. Select *App IDs*, then click Continue.
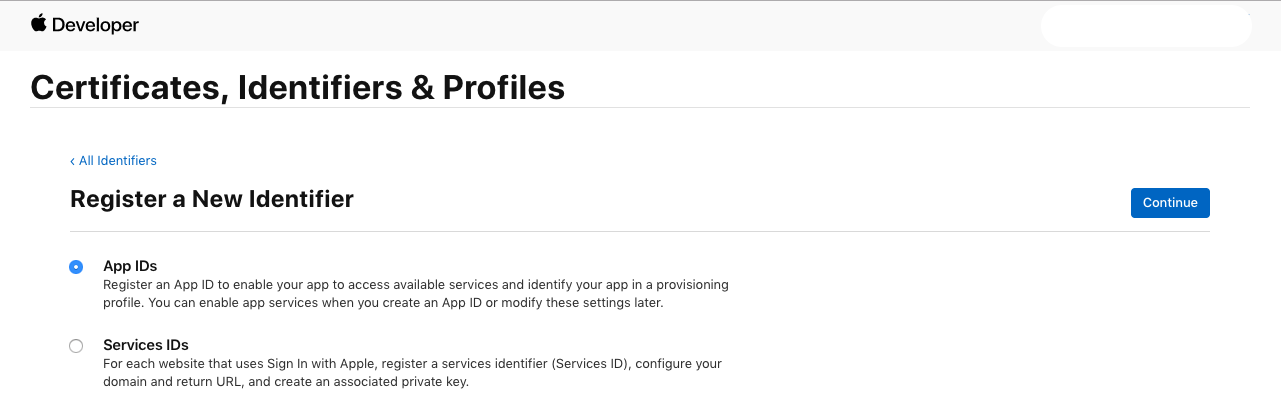 Figure 2. Register a New Identifier
4. In the *Register an App ID* page, choose `iOS` as the platform, enter some description and enter your *Bundle ID*.
5. In the list of capabilities, check *Sign in with Apple*.
6. Go back to the *Identifiers* page, and again click the add button (+).
7. Select *Services IDs*, then click Continue.
Figure 2. Register a New Identifier
4. In the *Register an App ID* page, choose `iOS` as the platform, enter some description and enter your *Bundle ID*.
5. In the list of capabilities, check *Sign in with Apple*.
6. Go back to the *Identifiers* page, and again click the add button (+).
7. Select *Services IDs*, then click Continue.
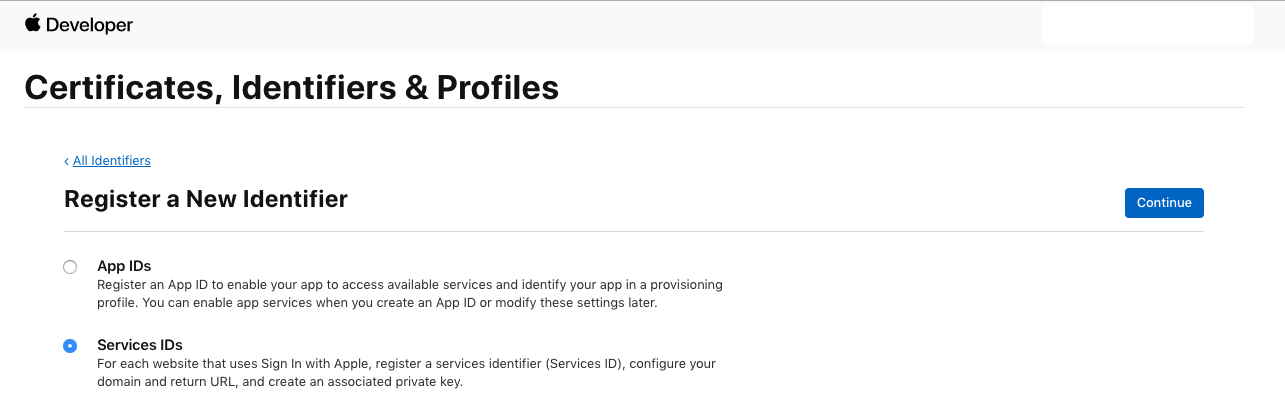 Figure 2. Register another Identifier
8. Enter a *Description* and an *Identifier*. The identifier will be later used as our `Apple Service ID`, so save it for later use.
9. Check *Sign in with Apple*, then click the *Configure* button next to it.
10. For the *Return URLs* please enter your [custom domain](/explore/custom-domain), followed by the path `/oidc/callback`, so for example `https://passwordless.acme.com/oidc/callback`. If a custom domain was not configured yet, you can enter `https://passwordless.ownid.com/oidc/callback`.
11. Click *Save* and then *Continue* and *Register*.
12. Back in the main *Certificates, Identifiers & Profiles* screen, choose *Keys* from the side navigation.
13. Click the plus icon (+) to register a new key. Give your key a name, and check the *Sign In with Apple* checkbox. Click *Configure*.
14. Choose your *Primary App ID* and click *Save*.
15. Download the key and save it in a secure location. You will need it later.
16. Go back to view the key information to find your *Key ID*, save it for later use.
## Step 2 - Configure in OwnID
Go to the OwnID console, `Authentication` > `Social Providers`:
* Toggle on `Apple Sign in`.
Figure 2. Register another Identifier
8. Enter a *Description* and an *Identifier*. The identifier will be later used as our `Apple Service ID`, so save it for later use.
9. Check *Sign in with Apple*, then click the *Configure* button next to it.
10. For the *Return URLs* please enter your [custom domain](/explore/custom-domain), followed by the path `/oidc/callback`, so for example `https://passwordless.acme.com/oidc/callback`. If a custom domain was not configured yet, you can enter `https://passwordless.ownid.com/oidc/callback`.
11. Click *Save* and then *Continue* and *Register*.
12. Back in the main *Certificates, Identifiers & Profiles* screen, choose *Keys* from the side navigation.
13. Click the plus icon (+) to register a new key. Give your key a name, and check the *Sign In with Apple* checkbox. Click *Configure*.
14. Choose your *Primary App ID* and click *Save*.
15. Download the key and save it in a secure location. You will need it later.
16. Go back to view the key information to find your *Key ID*, save it for later use.
## Step 2 - Configure in OwnID
Go to the OwnID console, `Authentication` > `Social Providers`:
* Toggle on `Apple Sign in`.
 By default, OwnID testing credentials are provided, but they are strictly for development use only. Follow this tutorial to configure your own Google credentials for production.
* Click **configure** and enter the following values in the modal:
By default, OwnID testing credentials are provided, but they are strictly for development use only. Follow this tutorial to configure your own Google credentials for production.
* Click **configure** and enter the following values in the modal:
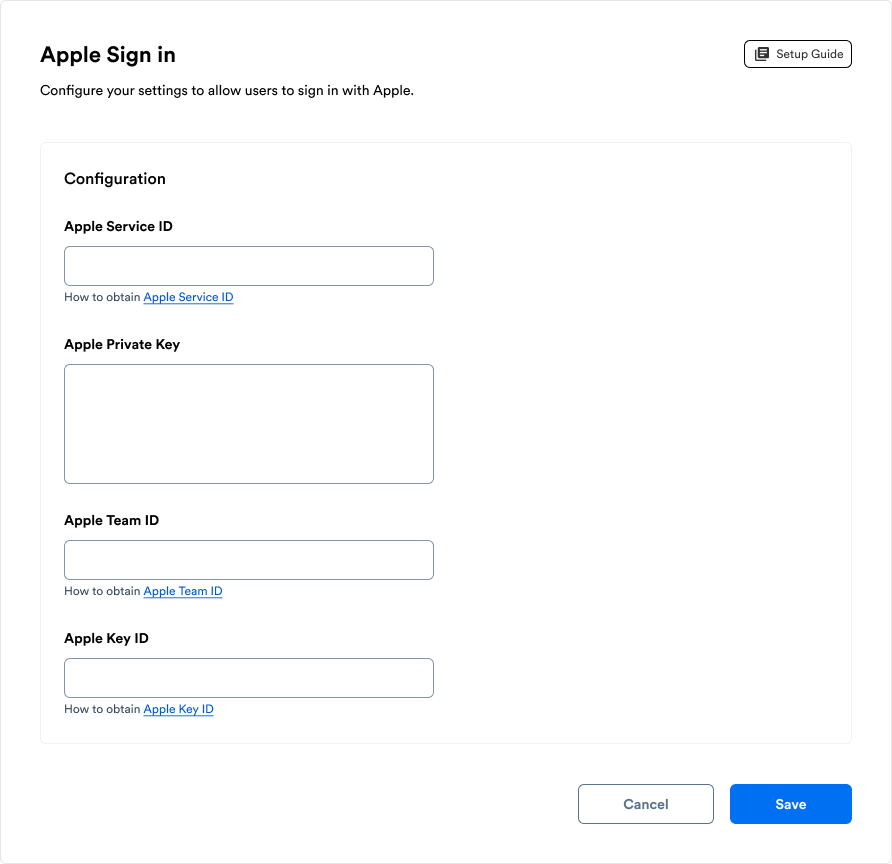 * `Apple Service ID` is the *Identifier* you created in the *Services IDs* section in the Apple Developer portal.
* `Apple Private Key` is the value of the private key you downloaded, including the `-----BEGIN PRIVATE KEY-----...` padding.
* In the `Apple Team ID` field, enter your Apple Developer Team ID.
* In the `Apple Key ID` field, enter the *Key ID* you got from the Apple Developer portal.
## Apple Configuration for whitelisting Senders for sending emails to apple email-relays
* Log in to your [Apple Developer Account](https://developer.apple.com/).
* Navigate to Certificates, Identifiers & Profiles.
* In the sidebar, click Services.
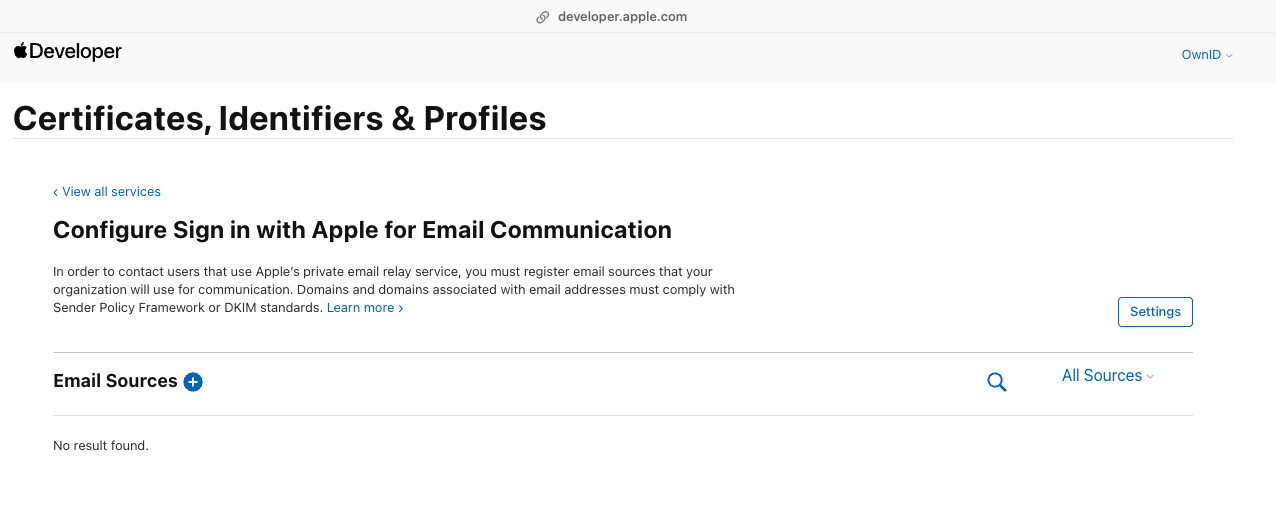
* Find Sign in with Apple for Email Communication and click Configure.
* `Apple Service ID` is the *Identifier* you created in the *Services IDs* section in the Apple Developer portal.
* `Apple Private Key` is the value of the private key you downloaded, including the `-----BEGIN PRIVATE KEY-----...` padding.
* In the `Apple Team ID` field, enter your Apple Developer Team ID.
* In the `Apple Key ID` field, enter the *Key ID* you got from the Apple Developer portal.
## Apple Configuration for whitelisting Senders for sending emails to apple email-relays
* Log in to your [Apple Developer Account](https://developer.apple.com/).
* Navigate to Certificates, Identifiers & Profiles.
* In the sidebar, click Services.
* Find Sign in with Apple for Email Communication and click Configure.
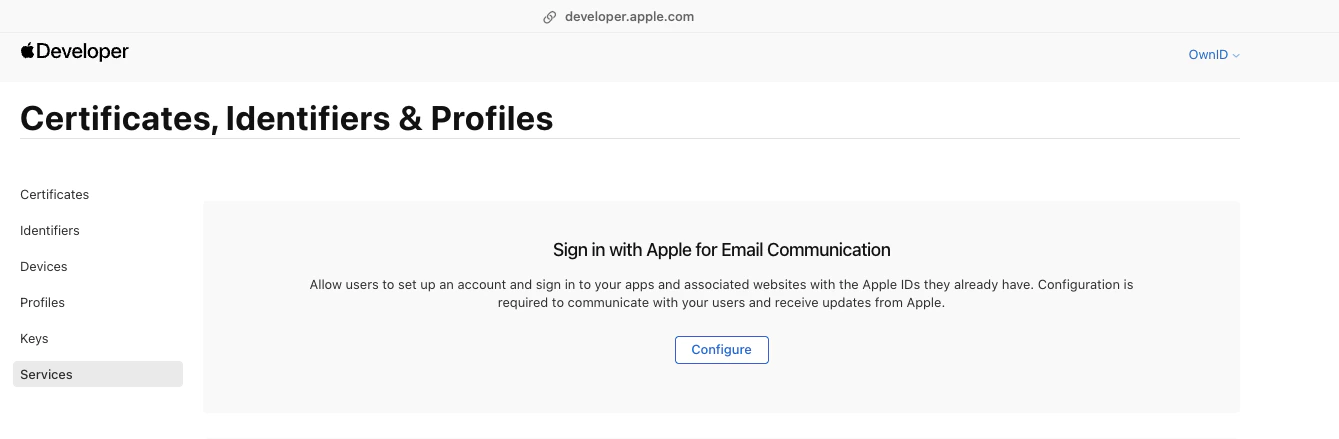 * In the Email Sources section:
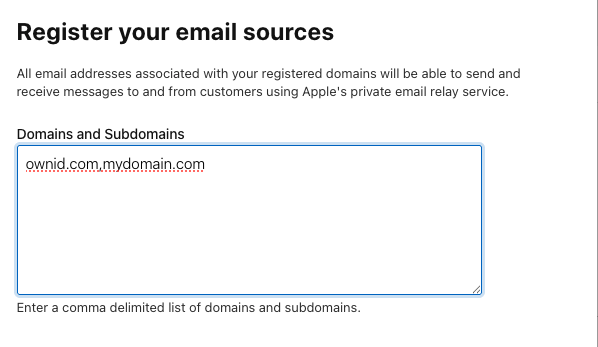
* To register a domain: Click the plus (+) icon and enter your domain (e.g., example.com).
* To register specific emails: Use the same section to add individual addresses (e.g., [support@example.com](mailto:support@example.com)).
* In the Email Sources section:
* To register a domain: Click the plus (+) icon and enter your domain (e.g., example.com).
* To register specific emails: Use the same section to add individual addresses (e.g., [support@example.com](mailto:support@example.com)).