How it Works
OwnID supports integration with Shopify through our pre-built Shopify Connector. To use it, create your OwnID app in the Console and select the Shopify Plus connector as described below.
Step 1 - Enable Multipass
Multipass login is for store owners who have a separate website and a Shopify store. It redirects users from the website to the Shopify store and seamlessly logs them in with the same email address they used to sign up for the original website. If no account with that email address exists yet, one is created. There is no need to synchronize any customer databases.To Enable Multipass
- Log in to your Shopify admin and go to the Settings > Checkout and accounts page.
- Scroll down to the Customer accounts section section and ensure that you have “Allow customers to log in from online store and checkout” selected.
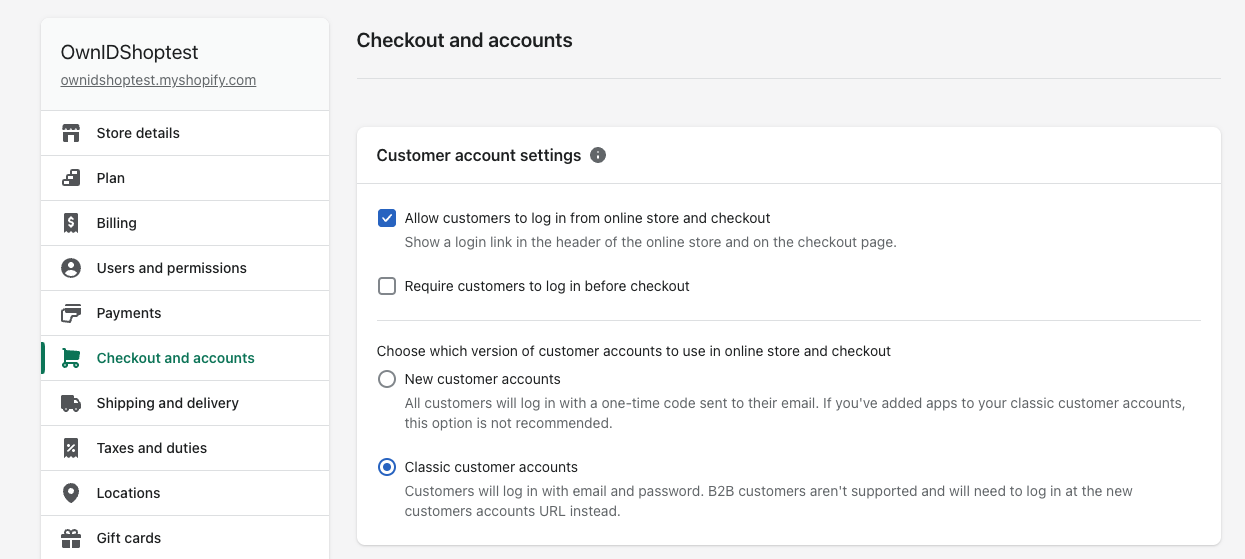
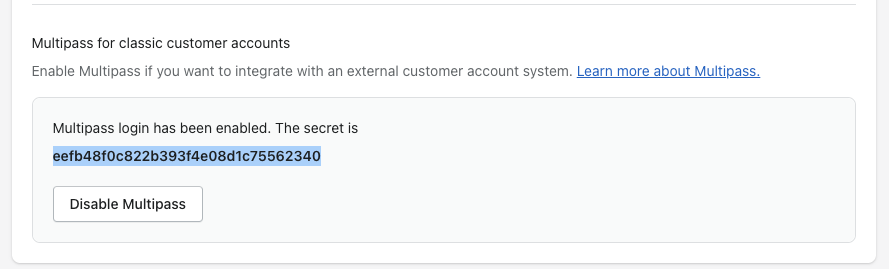
- Select Enable Multipass.
Step 2 - Get your Shopify Token
To implement our Shopify integration you will need to specify two identifiers:- URL of your Shopify Store
- Shopify API access token.
- Log in to your Shopify Store as the store owner.
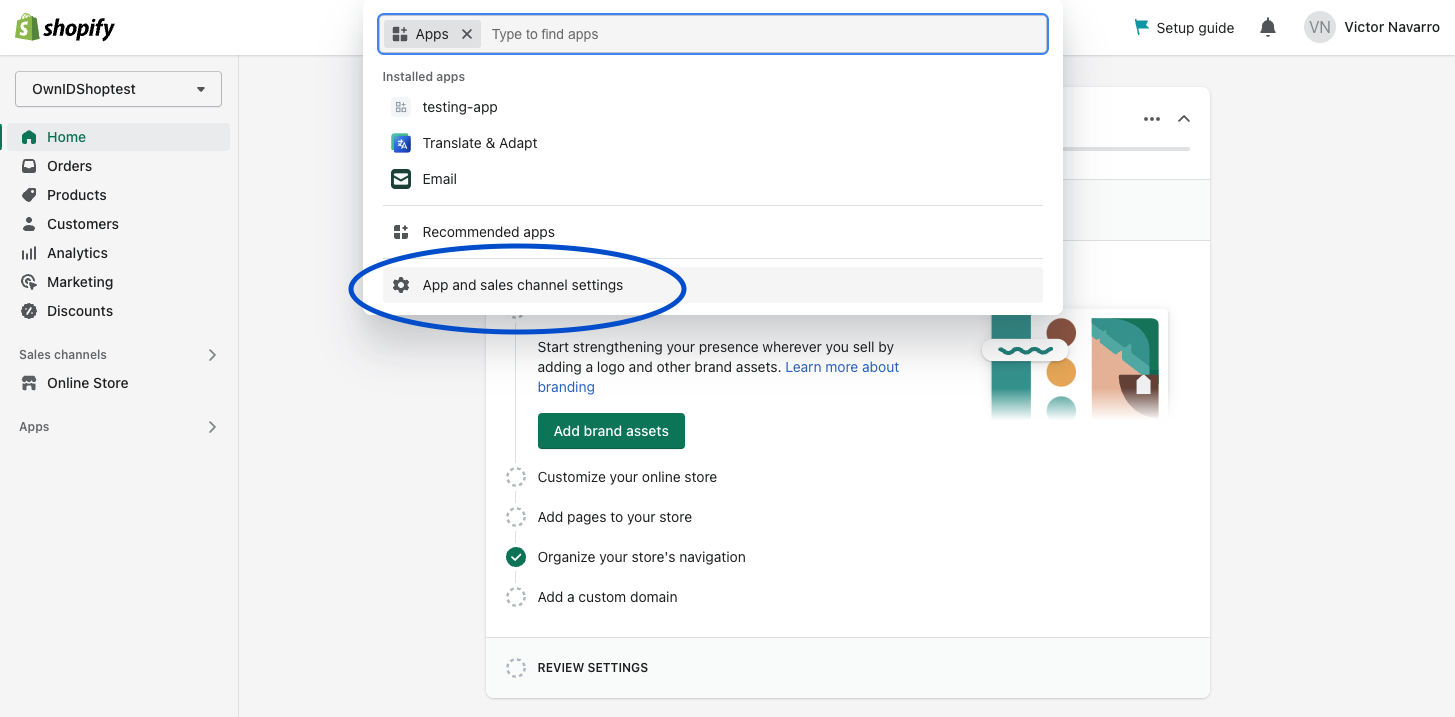
- Select Apps in the admin section on the left sidebar.
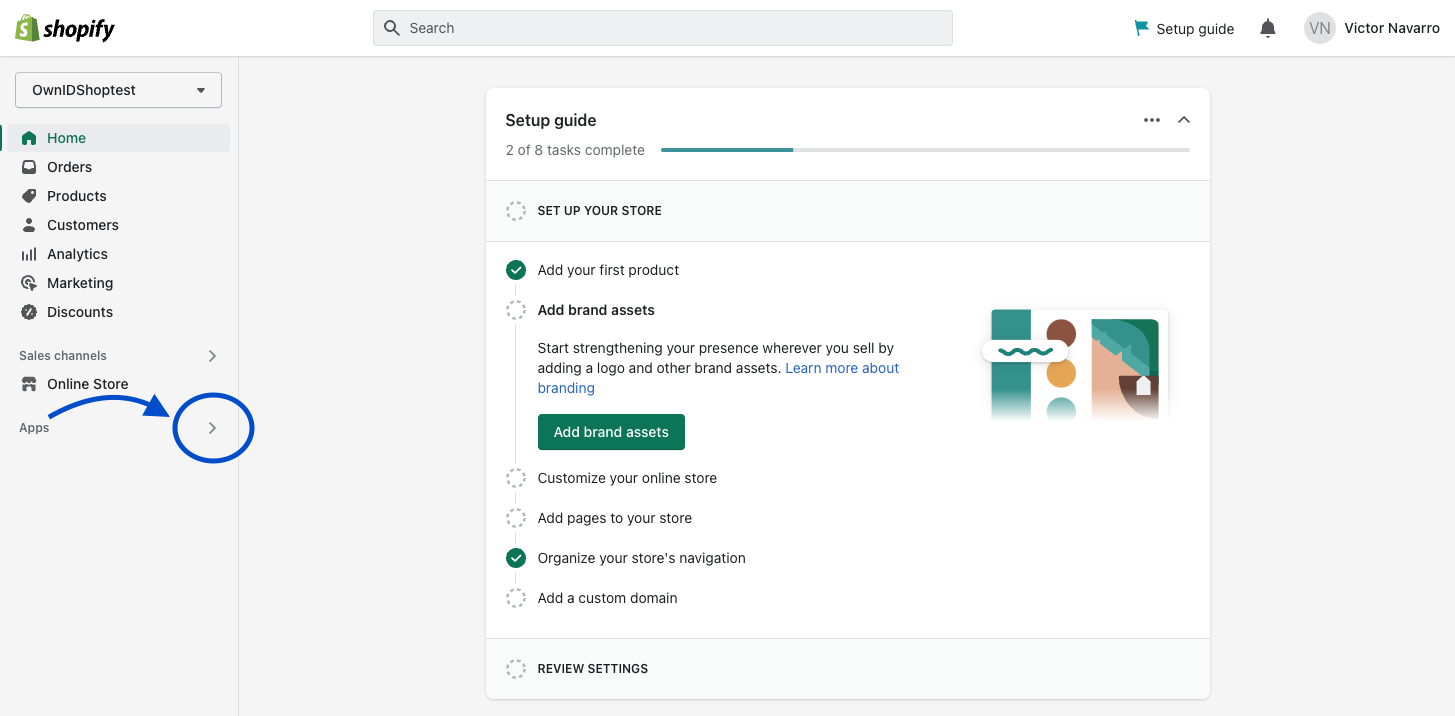
- From the dropdown menu, select Apps and sales channels settings.
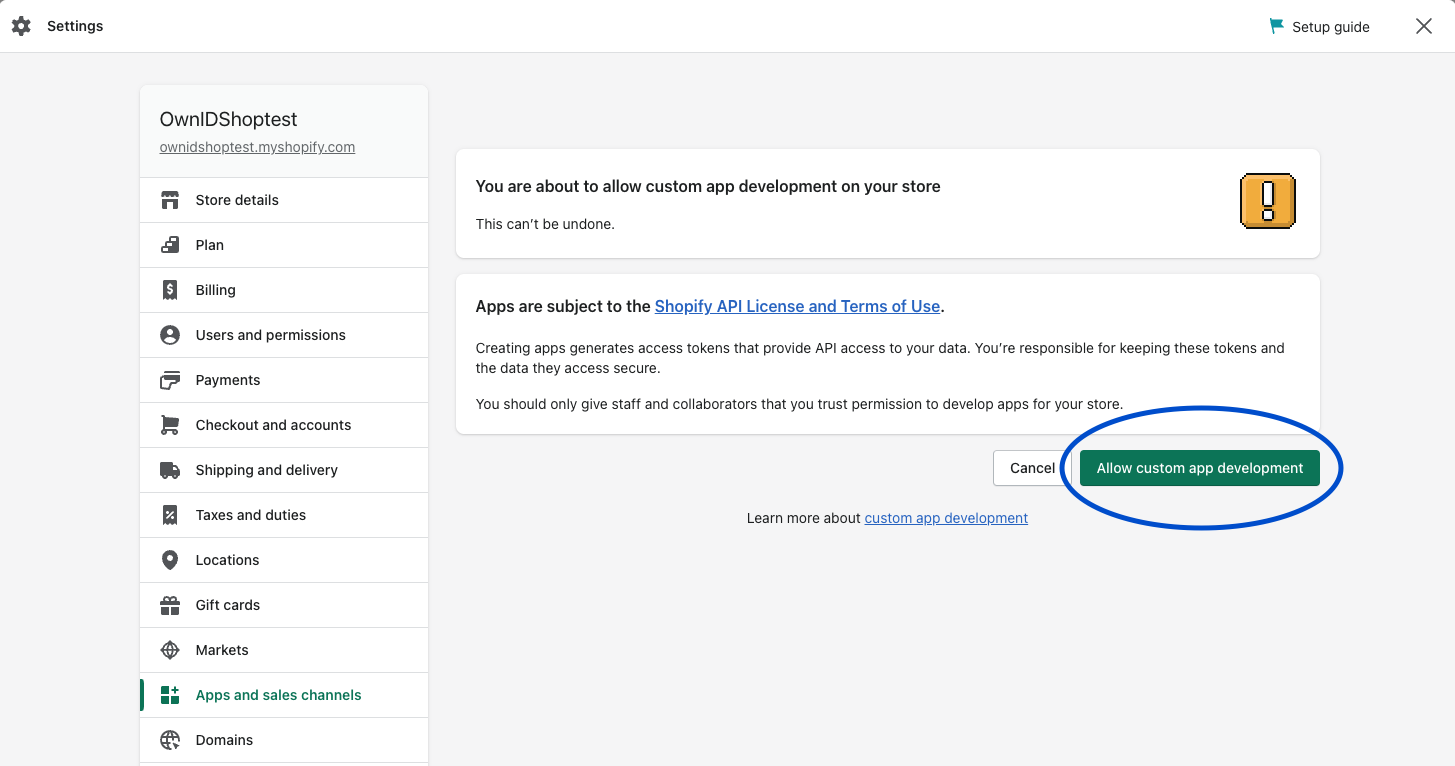
- In the next window that appears click on Develop apps for your store.

- Click to Allow Custom App Development in the next two screens.
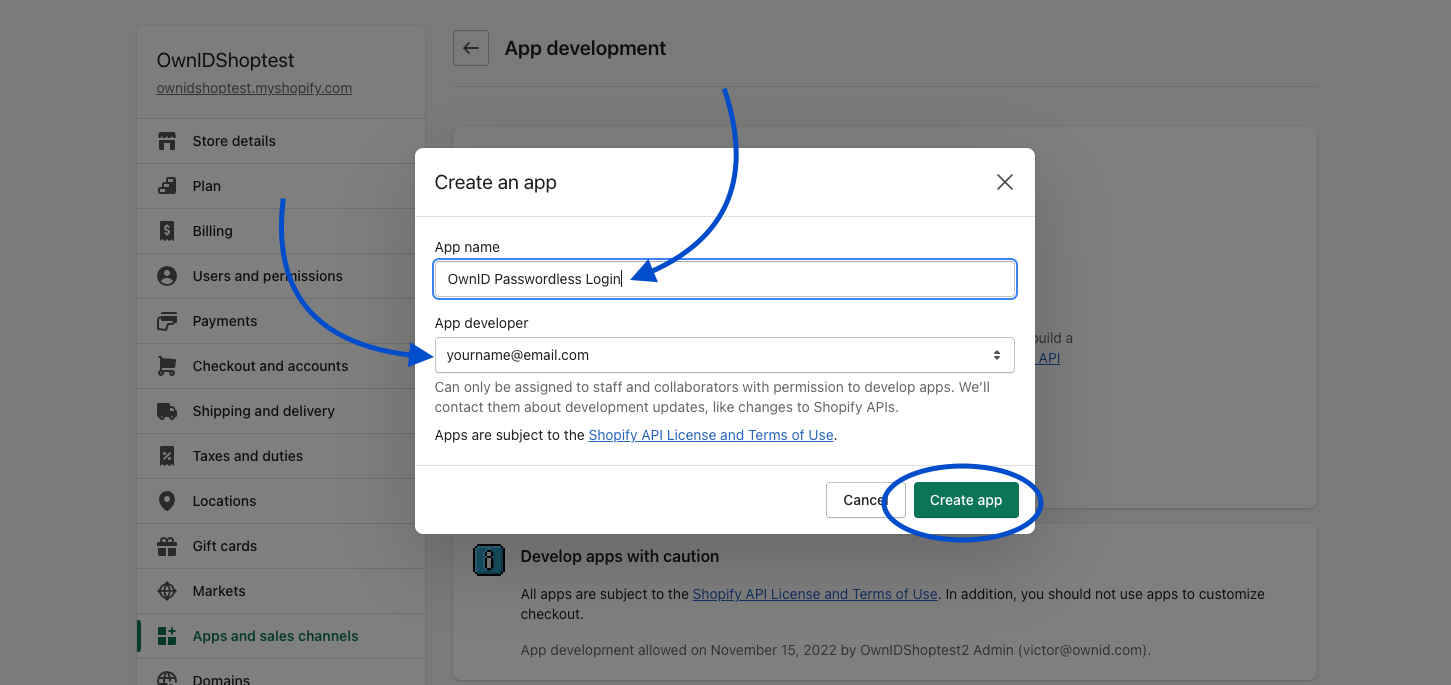
- Select Create an app. You’ll be asked to give your app a name, and add your email in the App developer text box.
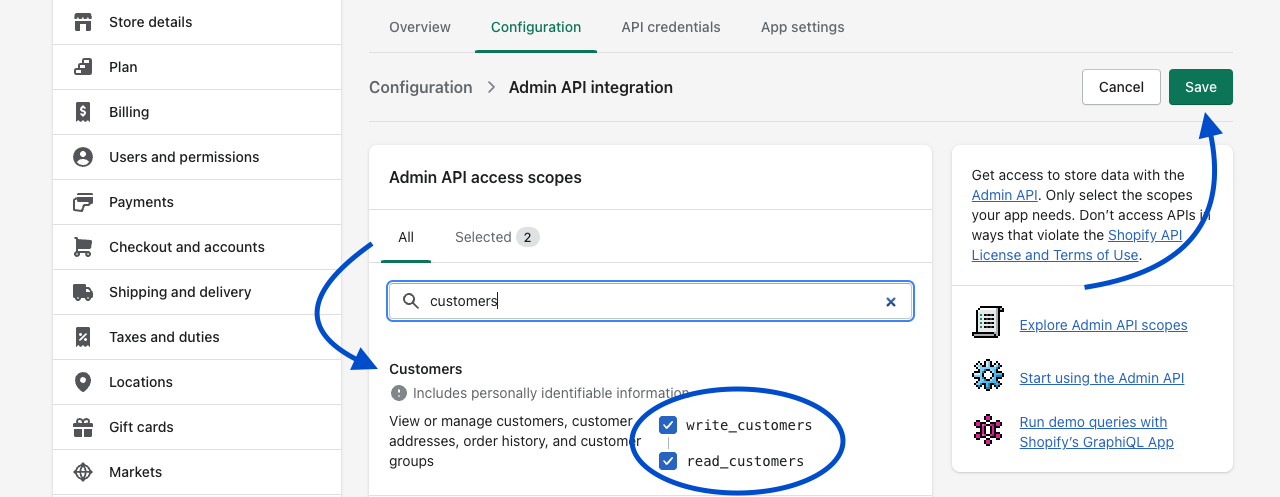
- Navigate to the Configuration tab and select Configure in the Admin API Integration section.
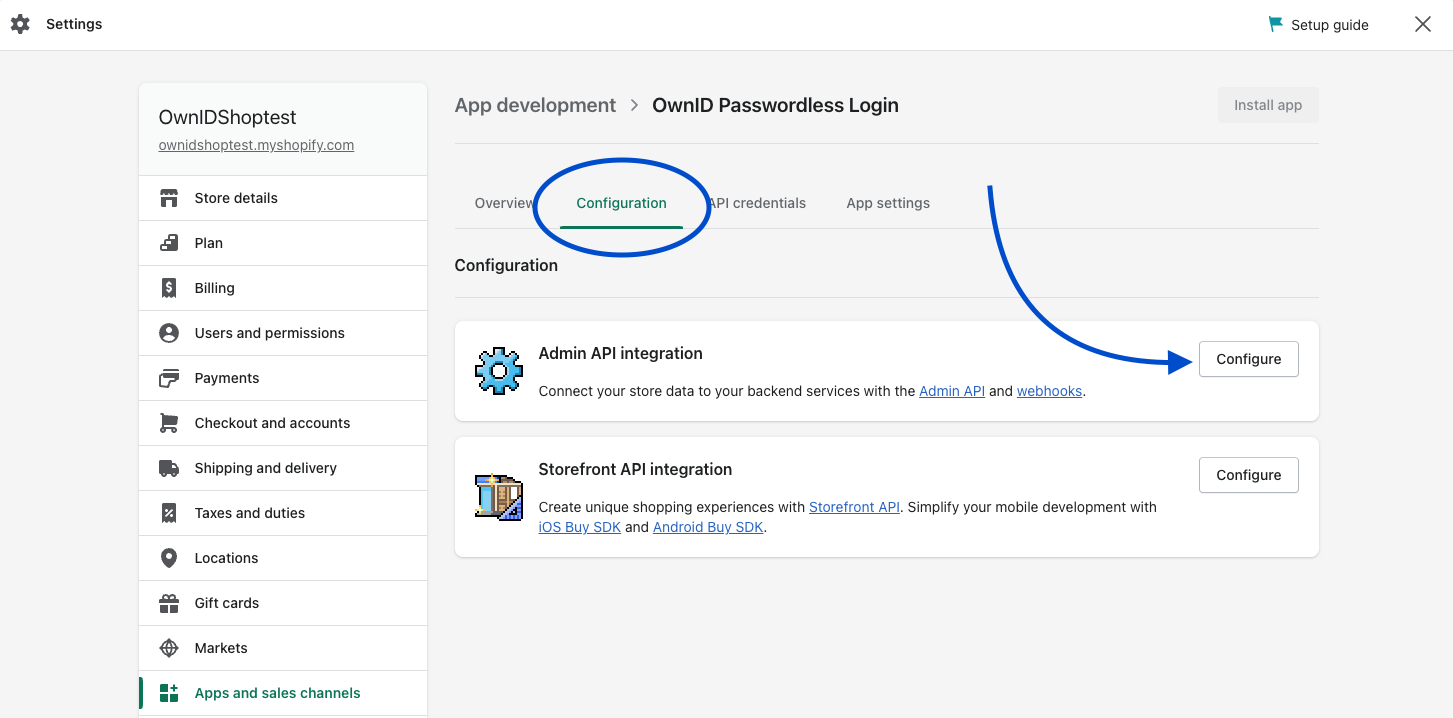
- Under Admin API access scopes you’ll see many categories. Scroll down until you reach Customers, or search for “Customers” in the search bar.
- Select the boxes for ‘write_customers’ and ‘read_customers’
- Click Save.
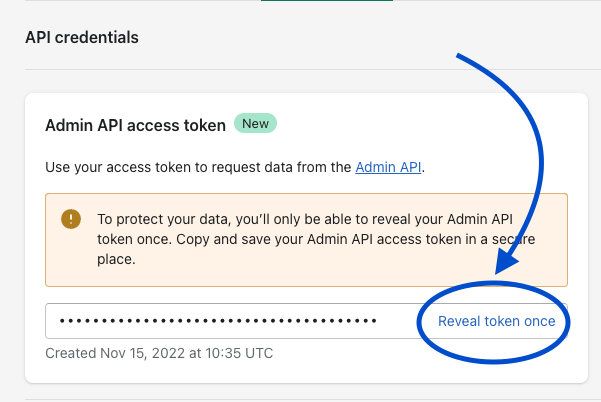
- Go to the API Credentials and click on Install in the Access tokens box. The Admin API Access Token is generated. Click on Reveal token once to see the token as plain text. Make a copy to use during onboarding in the OwnID console.
Securing User’s Personal DataOwnID does not store or process any user data. Users’ public keys and device information are stored on your platform.Private keys are kept exclusively on the user’s device and are never transmitted elsewhere.
Step 3 - Create OwnID Application
Each website integrating with OwnID must have an OwnID application.- Login to the OwnID Console (or create your account).
- Click +Create Application from the Apps screen.
- Enter a name for your application in the App name field.
-
From the Choose your integration panel, select the Shopify Plus tile.

- Click Next.
-
Enter the your Shopify settings and click Continue.

-
Click Explore my App on the “Congratulations” popup.

-
From the OwnID Settings panel, copy the App ID and the Shared Secret for use in configuration on the Shopify side.

Your OwnID application and secret key are created and you’re ready for next steps!
Shopify Multipass secret and Shopify API Access Token described above.
Step 4 - Add the OwnID Widget
Lastly, we’ll add the passwordless widget to the frontend login and registration forms. Do this by editing three pages of your Shopify theme:- From your Shopify admin, go to Online Store > Themes.
- Click Actions > Edit code. The code editor shows a directory of theme files on the left, and a space to view and edit the files on the right.
- On the left panel, go to the folder Layout and select the file theme.liquid. Place the following script in the
<head>of the file:
- Go to the Sections folder and select the file main-login.liquid. Place the following code after your login form:
- Finally, inside the same folder Sections, select the file main-register.liquid.
- Add the following input after your password field element, inside the registration form:
- In the same file, insert the following code below the registration form:
- Save your changes.
Congratulations! Enjoy your Shopify Plus passwordless authentication!
Client secrets
Your app’s client secret is a unique key that authenticates your app when it requests access to a store’s data. You can use your client secret to retrieve an access token for a store, or to verify a webhook request is genuine. Retrieve your app’s client credentials Anchor link to section titled “Retrieve your app’s client credentials” You can manually retrieve your app’s client credentials in the Partner Dashboard.- Log in to your Partner Dashboard.
- Click Apps.
- Click the name of the app you want to retrieve client credentials for.
- Click Client credentials.
- View or copy your client ID and client secret.
Next Steps
Ready to deploy?
YES!
Take me to the Deployment Checklist