Overview
To enable passkey functionality in your native application, you need to properly configure well-known files for both iOS and Android platforms. These files establish the association between your website and your mobile applications, allowing for seamless passkey operations. This guide walks you through the setup process for both platforms.Hosting Requirements
- The files must be publicly accessible at:
https://[your-domain]/.well-known/apple-app-site-associationandhttps://[your-domain]/.well-known/assetlinks.json - HTTPS is mandatory
- The file must be served with the
application/jsoncontent type - No redirects are allowed
1. iOS Configuration
1.1 Setting up apple-app-site-association
The apple-app-site-association (AASA) file is required to establish a secure connection between your website and iOS application for passkey support.- Create a file named
apple-app-site-association(without any file extension) - Place it in the
.well-knowndirectory at your domain root - Serve it with the
application/jsoncontent type
TEAM_ID: Your Apple Developer Team ID (found in the Apple Developer Portal)BUNDLE_ID: Your iOS application’s bundle identifier
Wildcards (*.example.myapp) in bundle identifiers are not supported
1.2 Configuring Associated Domains Entitlement
Before your iOS app can use webcredentials, you need to configure the Associated Domains entitlement. This entitlement establishes a secure connection between your website and iOS app. Here’s how to set it up:Using Xcode
- Open your Xcode project
- Select your target in the project navigator
- Click on the “Signing & Capabilities” tab
- Click the ”+” button in the top-left corner of the capabilities editor
- Search for and select “Associated Domains”
- Click the ”+” button under “Domains”
- Add an entry in the following format:
https://example.com, you would add:

Using Entitlements File
If you prefer to configure entitlements manually:- Create or open your
.entitlementsfile - Add the following configuration:
- The domain must exactly match the domain where your apple-app-site-association file is hosted
- Don’t include the protocol (http:// or https://) in the domain specification
- For development and testing:
- Enable the “Associated Domains Development” option in Xcode’s signing capabilities
- Use your development team’s provisioning profile
- Make sure your Apple Developer account has Associated Domains enabled
- Open your app’s
.entitlementsfile - Ensure the
com.apple.developer.associated-domainsentry exists with your domain - Build your app and check the generated
embedded.mobileprovisionfile contains the entitlement - You can examine the provisioning profile using:
2. Android Configuration
2.1 Setting up assetlinks.json
For Android, you need to create an assetlinks.json file to establish the digital asset links between your website and Android application.- Create a file named
assetlinks.json - Place it in the
.well-knowndirectory at your domain root - Serve it with the
application/jsoncontent type
package_name: Your Android application’s package nameSHA256_FINGERPRINT: Your app’s SHA256 fingerprint
3. OwnID Console Configuration
- Log in to your OwnID Console
- Navigate to your Application
- Select “Integration” > “Native Apps” from the menu
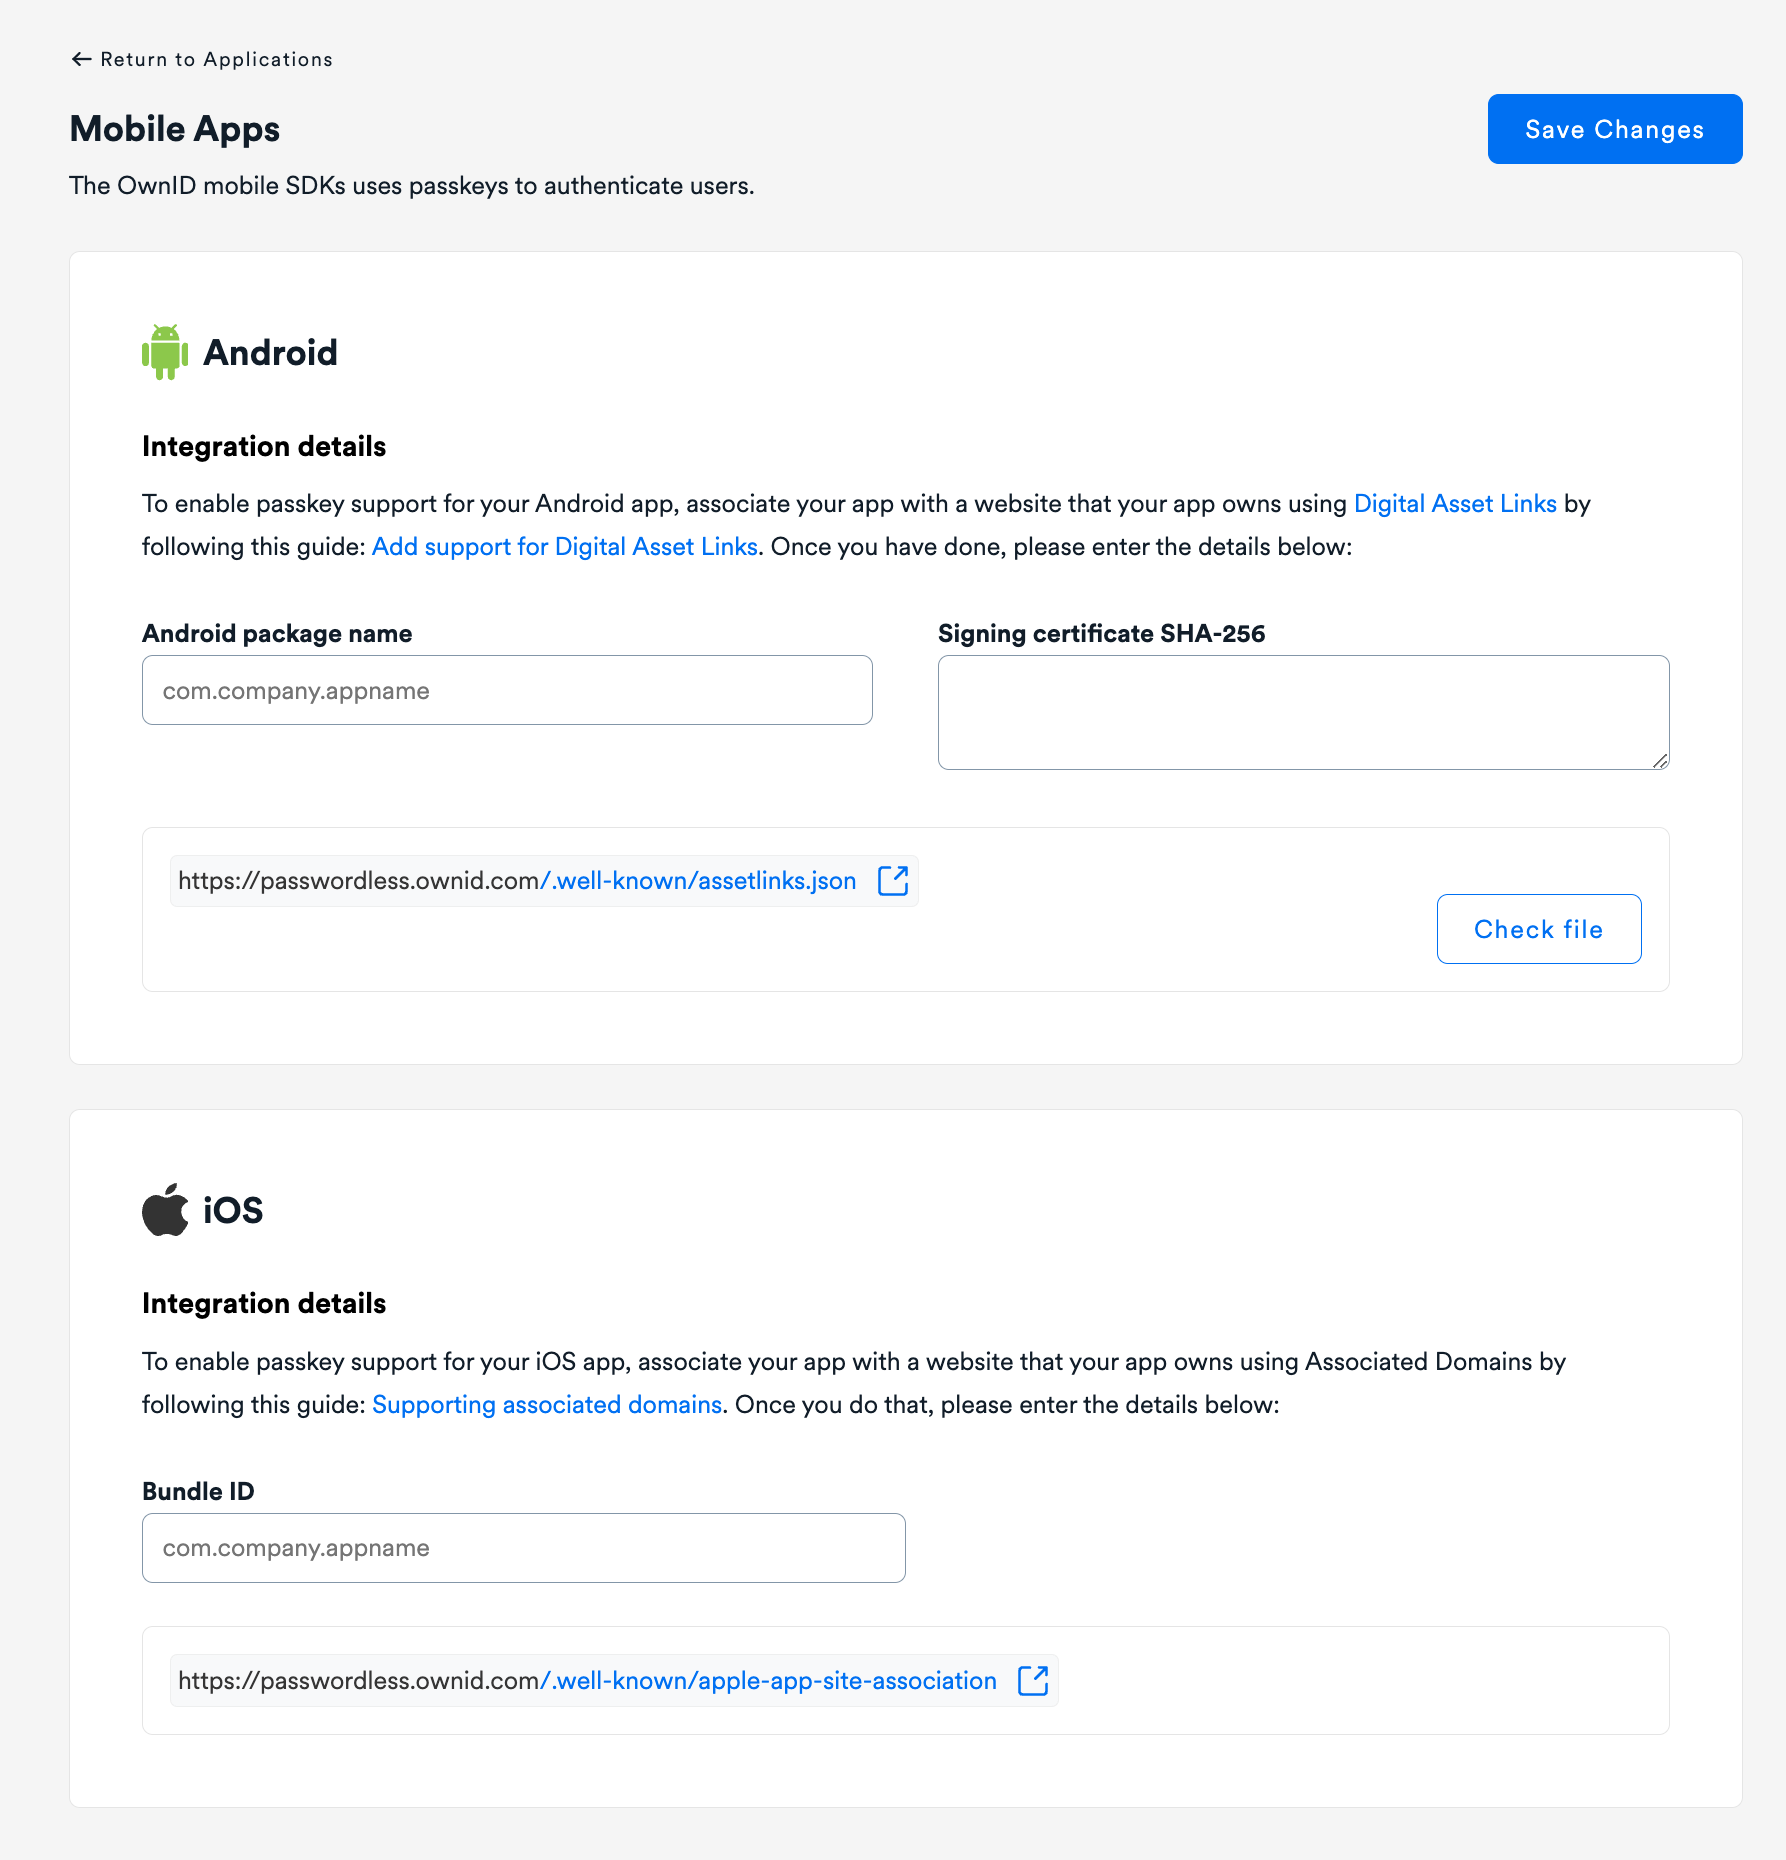
- Enter your Android Package Name (e.g.,
com.company.appname) - Provide the SHA-256 certificate fingerprint from your app’s signing certificate
- This should match the fingerprint you’ll use in your assetlinks.json file
- Enter your iOS Bundle ID (e.g.,
com.company.appname)- This should match the bundle identifier in your Xcode project
- Make sure it’s the same identifier you’ll use in your apple-app-site-association file
Verification
- Use Apple’s verification tool at https://app-site-association.cdn-apple.com/a/v1/[your-domain]
- Use Google’s Asset Links Tool: https://developers.google.com/digital-asset-links/tools/generator
- In
Relation Typechoose “Credential Sharing”
- In
Common Issues and Troubleshooting
iOS- Ensure your AASA file is served without any file extension
- Verify the content-type header is correctly set to
application/json - Check that your Team ID and Bundle ID exactly match your iOS app configuration
- Make sure HTTPS is properly configured with a valid SSL certificate
- Verify the SHA256 fingerprint matches your app signing certificate
- Ensure the package name exactly matches your Android app’s package name
- Check that the assetlinks.json file is accessible without any redirects
- Confirm HTTPS is properly configured with a valid SSL certificate