Prerequisites
To get the most out of this guide, make sure to do the following tasks first:- Complete the backend integrations (see Build Server-Side Endpoints).
- Complete the Login integration (see Login).
The instructions on this page assume you have already installed and referenced the OwnID SDK as described in Steps 1 and 2 of Login.
Integrating One-tap Sign-in
Implement a one-tap sign in on the desired pages.Add the Pop-Up Prompt to your Page
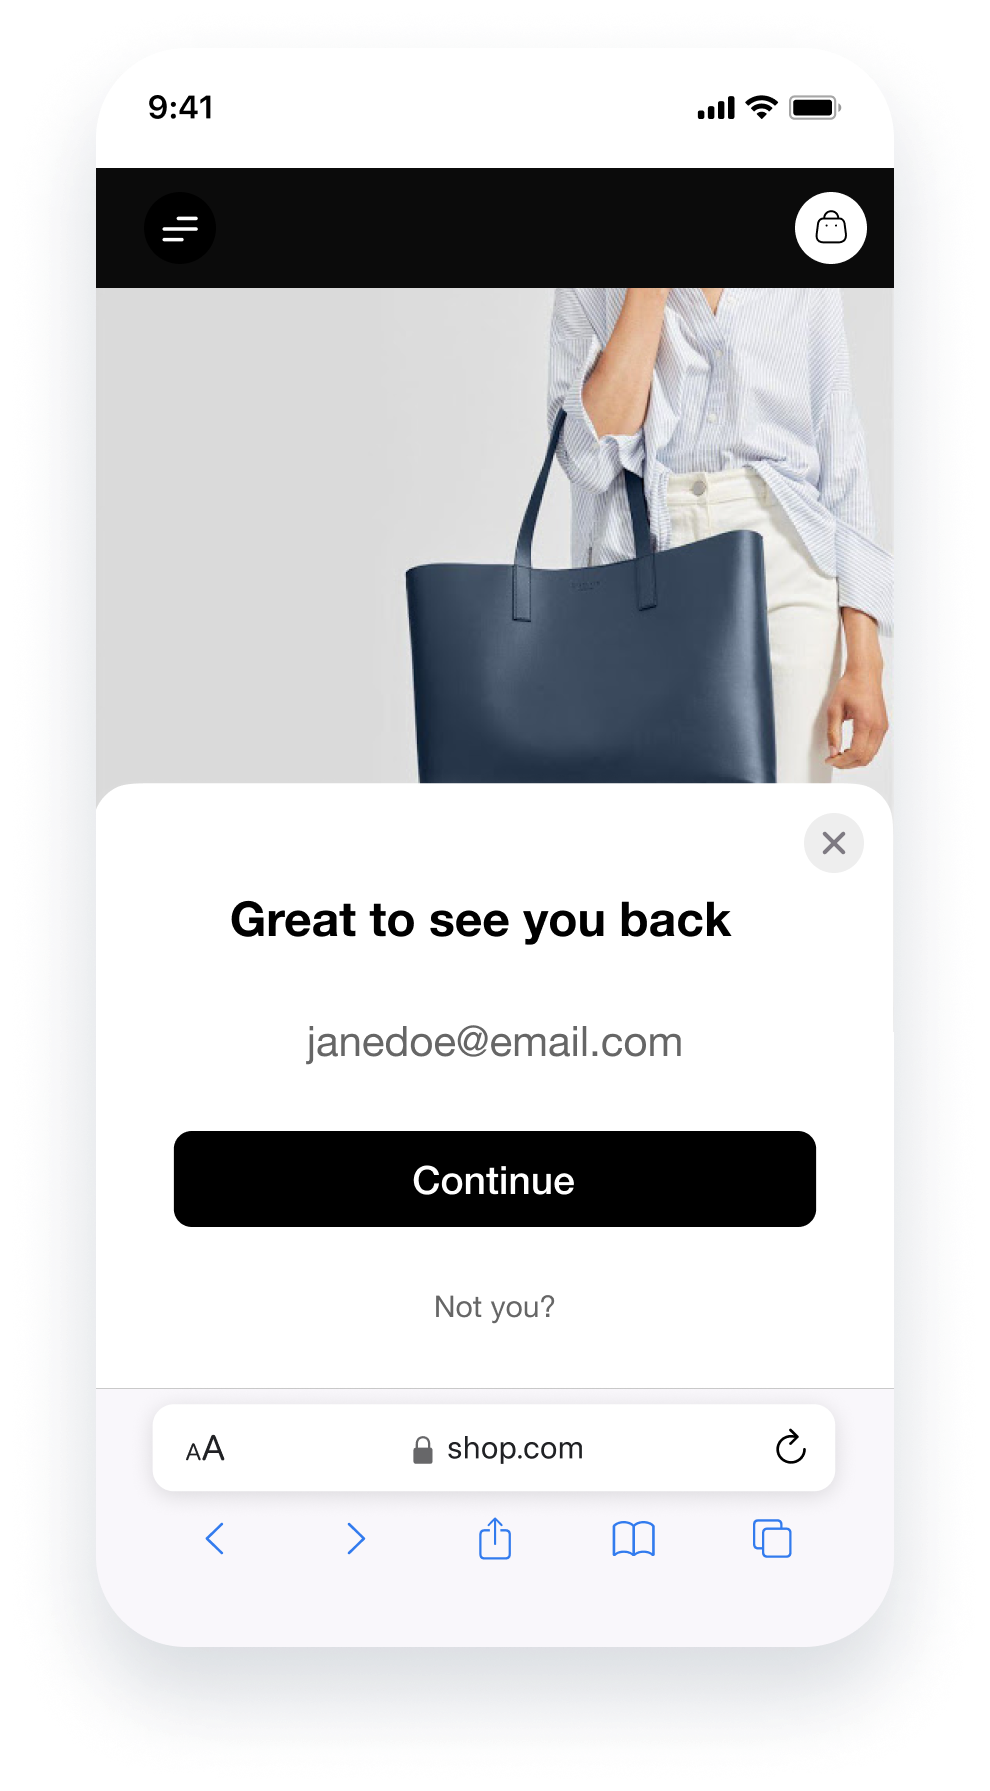
The SDK activateReturningUsersPrompt method is used to integrate with the one-tap sign-in journey. It starts by offering users on the site a pop-up to login by clicking the Continue button shown in Figure 1, if they’re not already logged in.Implement the activateReturningUsersPrompt Method
In theownid method:
- Enter activateReturningUsersPrompt for the method name.
-
Check to make sure the user isn’t already logged in using the
checkSessionasync function. Only iffalsethe prompt will be shown. -
Configure the
onLoginevent to copy thedata.tokenobject locally. Thedata.tokenis the value generated by thegetSessionByLoginIdendpoint and you should use it to set a user session or exchange it for a session token.
Session identifier can be ANY data ObjectAs noted in the Login integration, the session identifier can be any unique data object, even though we’re calling it a ‘token’. We only pass it right back to you so you’re able to associate a request with an active session.
- Assign an error function as desired in the
onErrorparameter.
Example on how to show the returning users prompt
That’s it!You’ve implemented the frontend functionality required to allow registered users who aren’t logged in to get a prompt to login with one tap from any page.If you’re ready to deploy your integration, make sure to read the Pre-Deployment Checklist before hand!
Next Steps
Ready to deploy?
YES!
Take me to the Deployment Checklist
NOT YET...
I want to build another user journey