Build Server-Side Endpoint
This endpoint handles a request to send an OTP to a specific email address using your own email provider integration. Implement this endpoint according to the specifications:Handle Requests
Headers You might notice two values in request headers from the OwnID plaform:ownid-signatureownid-timestamp
Console Configuration section above for detailed instructions.
Payload
OwnID will make requests to this endpoint with the following payload:
email- delivery email address of the user.subject- email subject according to what is defined in the email templates.body- email body in HTML format, according to what is defined in the email templates. Includes the .
payload example
Implement Responses
Implement these responses for your endpoint:Console Configuration
To get started, go to the OwnID console and login to your account.- From the Apps page, click the app you want to set up SMTP for.
-
Click the User journey link from the navigation panel.

-
On the OTP configuration panel, select Email under Delivery Channel.

- Click the Custom Provider bar.
- When the configuration form opens, enter:
- Endpoint URL. OwnID will use it to make requests to your web server.
- Custom HTTP Headers (optional). Input the header names and values.
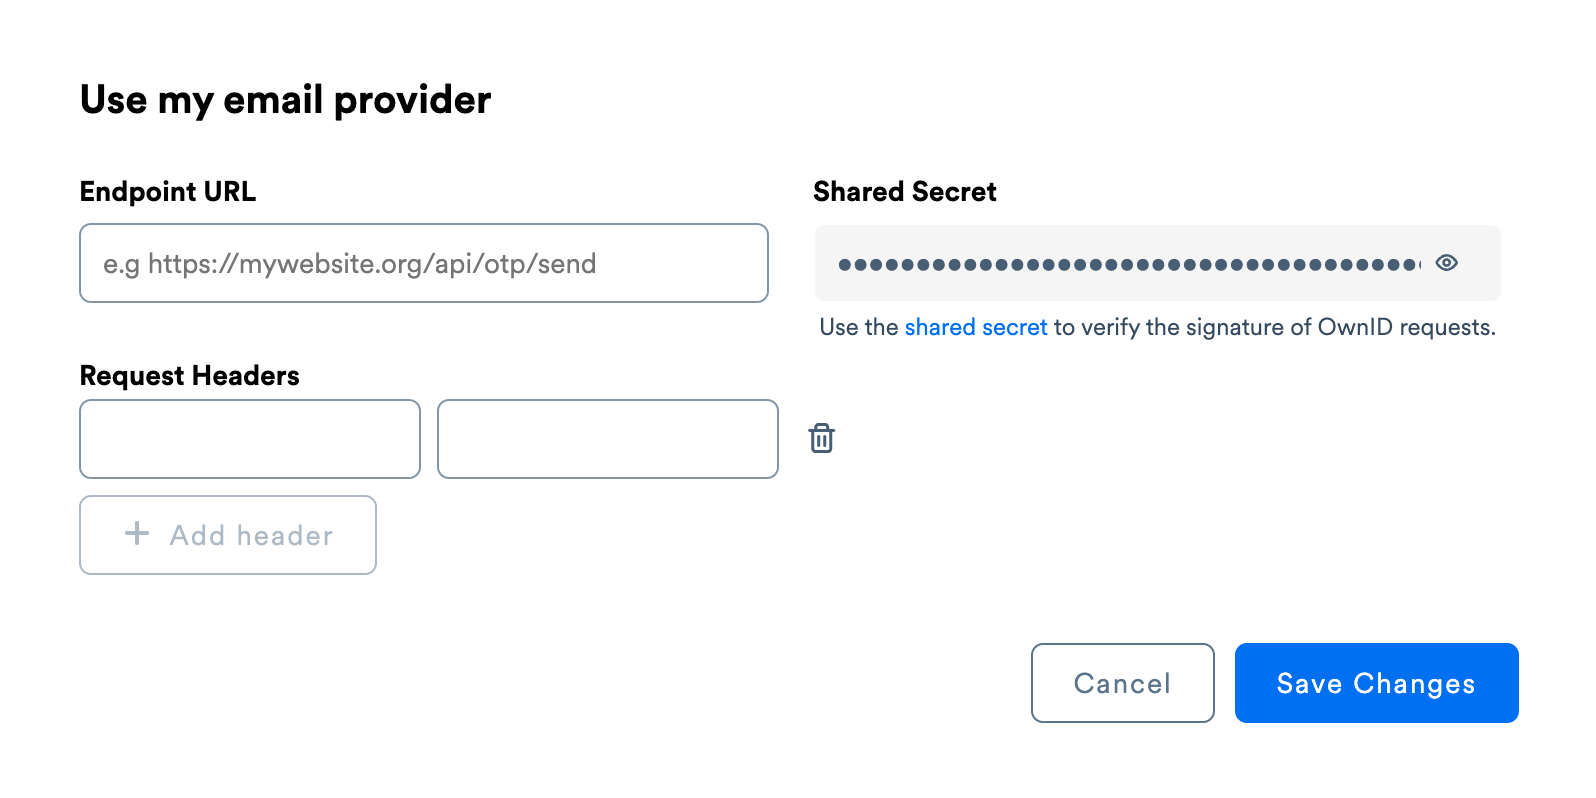
- Click Save Changes.