How Email is Used
The OwnID platform sends emails automatically when it needs to validate users with either a or a . For example, OwnID sends an authorization email when a user signs up or logs in for the first time but doesn’t have available biometrics on their device.Unique Templates for Each App
For each of your OwnID apps, you can create a unique email template to use when the system sends a Magic Link email and another template to use for Authorization(OTP) emails.Customize your Email Templates
To start customizing your templates:- Log into the Console and select the App that you want to associate with your template. The My App view opens.
- Go to Branding > Email templates from the left side navigation panel.
-
The Email templates page opens. From the Select a template option, you can select the type to edit, Magic link or Verification Email (using code).

Customize the Verification Template
-
To customize the body of your OTP verification emails, select the Verification option.

- Select the language to use in the email text from the Language dropdown.
- Enter the desired subject text.
- Modify the HTML content directly as desired in the embedded code editor.
<body> tags can be customized, and the recipient’s OTP is inserted wherever you place the {code} token.
Example OTP Email
- Click Preview to check what recipients will see in an authorization email.
 (Click Reset to start over with the default HTML.)
 - Click Save
Customize the Magic Link Template
-
To customize the body of your magic link emails, select Magic Link from the Select a template dropdown.

- Select the language to use in the email text from the Language dropdown.
-
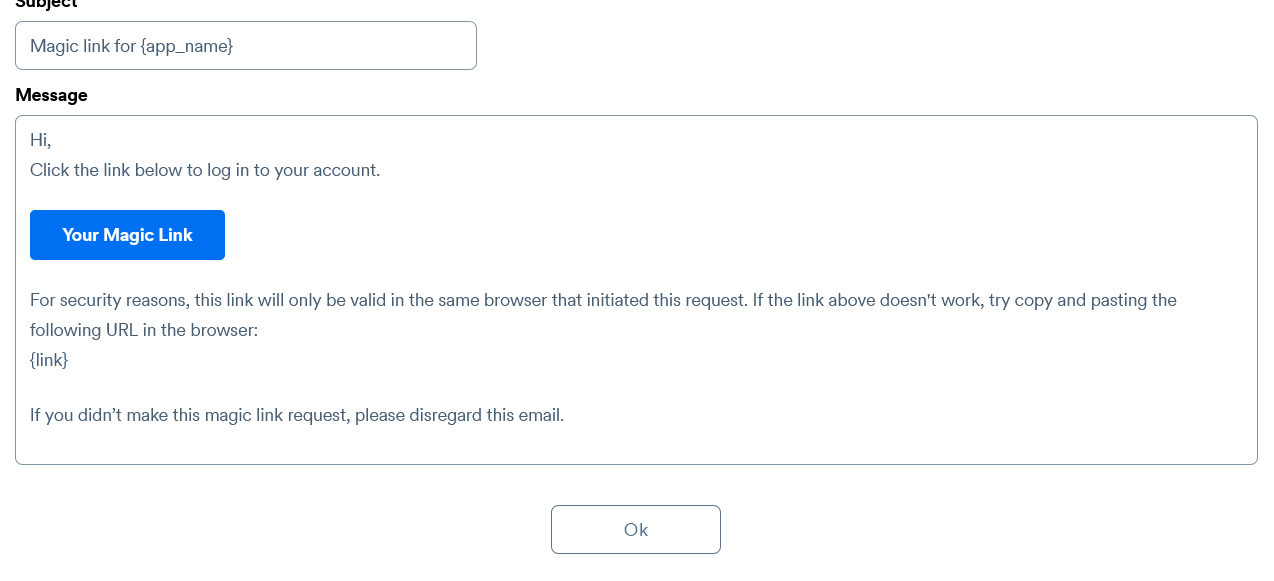
Enter the desired subject text. You can embed your App name in the subject using the
{app_name}token. - Modify the HTML content directly as desired in the embedded code editor.
<body> and <style> tags can be customized, and the recipient’s magic link is inserted in the DOM wherever you place the {link} token.
Example Magic Link Email
- Click Preview to check what recipients will see when they get a magic link email.

- Click Save to enable your new template.
Best Practices
Here’s a set of best practices to ensure your email template is both user-friendly and aligns well with your branding and security needs:- Branding and Design Consistency
- Use Company Logo: Include your company logo at the top of the email to establish trust and brand recognition immediately.
- Consistent Color Scheme: Utilize colors from your brand palette to reinforce brand identity without overwhelming the content.
- Clear and Simple Layout
- Focus on the Code: The one-time code should be the focal point of the email. Ensure it’s prominently displayed, perhaps even in a separate box to draw attention.
- Enhanced Visibility: Use a larger font size for the code, make it bold, and consider a contrasting color (that still aligns with your brand) to make it stand out.
- Minimal Text: Keep other text to a minimum. Just include essential information such as what the code is for and a brief instruction on how to use it.
- Concise and Direct Content
- Clear Instructions: Clearly state the purpose of the email. For example: “Here is your login code for [Brand Name].”
- Expiration Notice: Mention how long the code will be valid to add urgency and clarify user action needed (e.g., “This code expires in 10 minutes.”).
- No Links, If Possible: Avoid including links other than necessary ones like a direct login page. This reduces the risk of phishing.
- Accessibility
- Readable Font Style and Size: Use a clear, easily readable typeface. Avoid overly stylized fonts that might be hard to read.
- Accessible Colors: Ensure that text colors have sufficient contrast with the background for those with visual impairments.